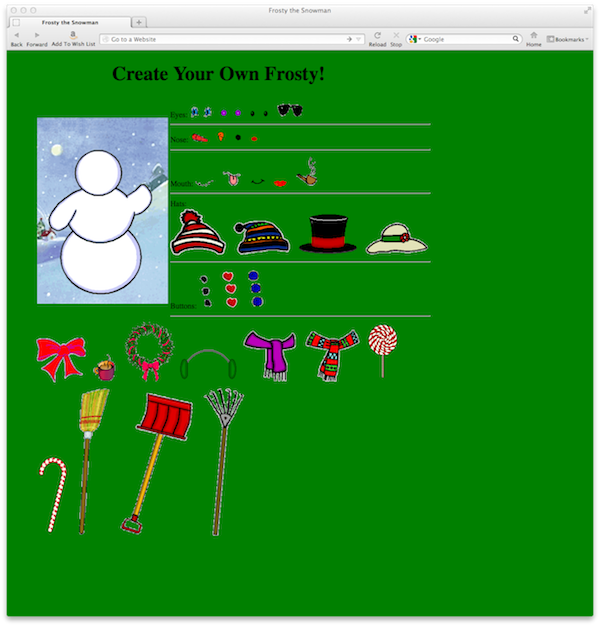
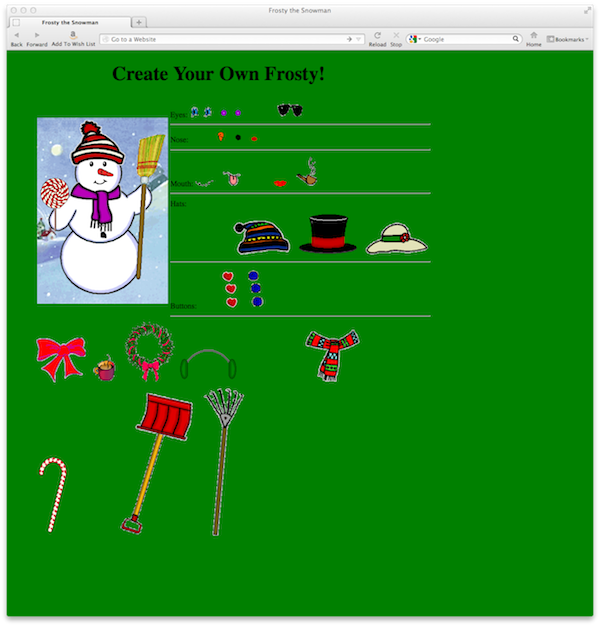
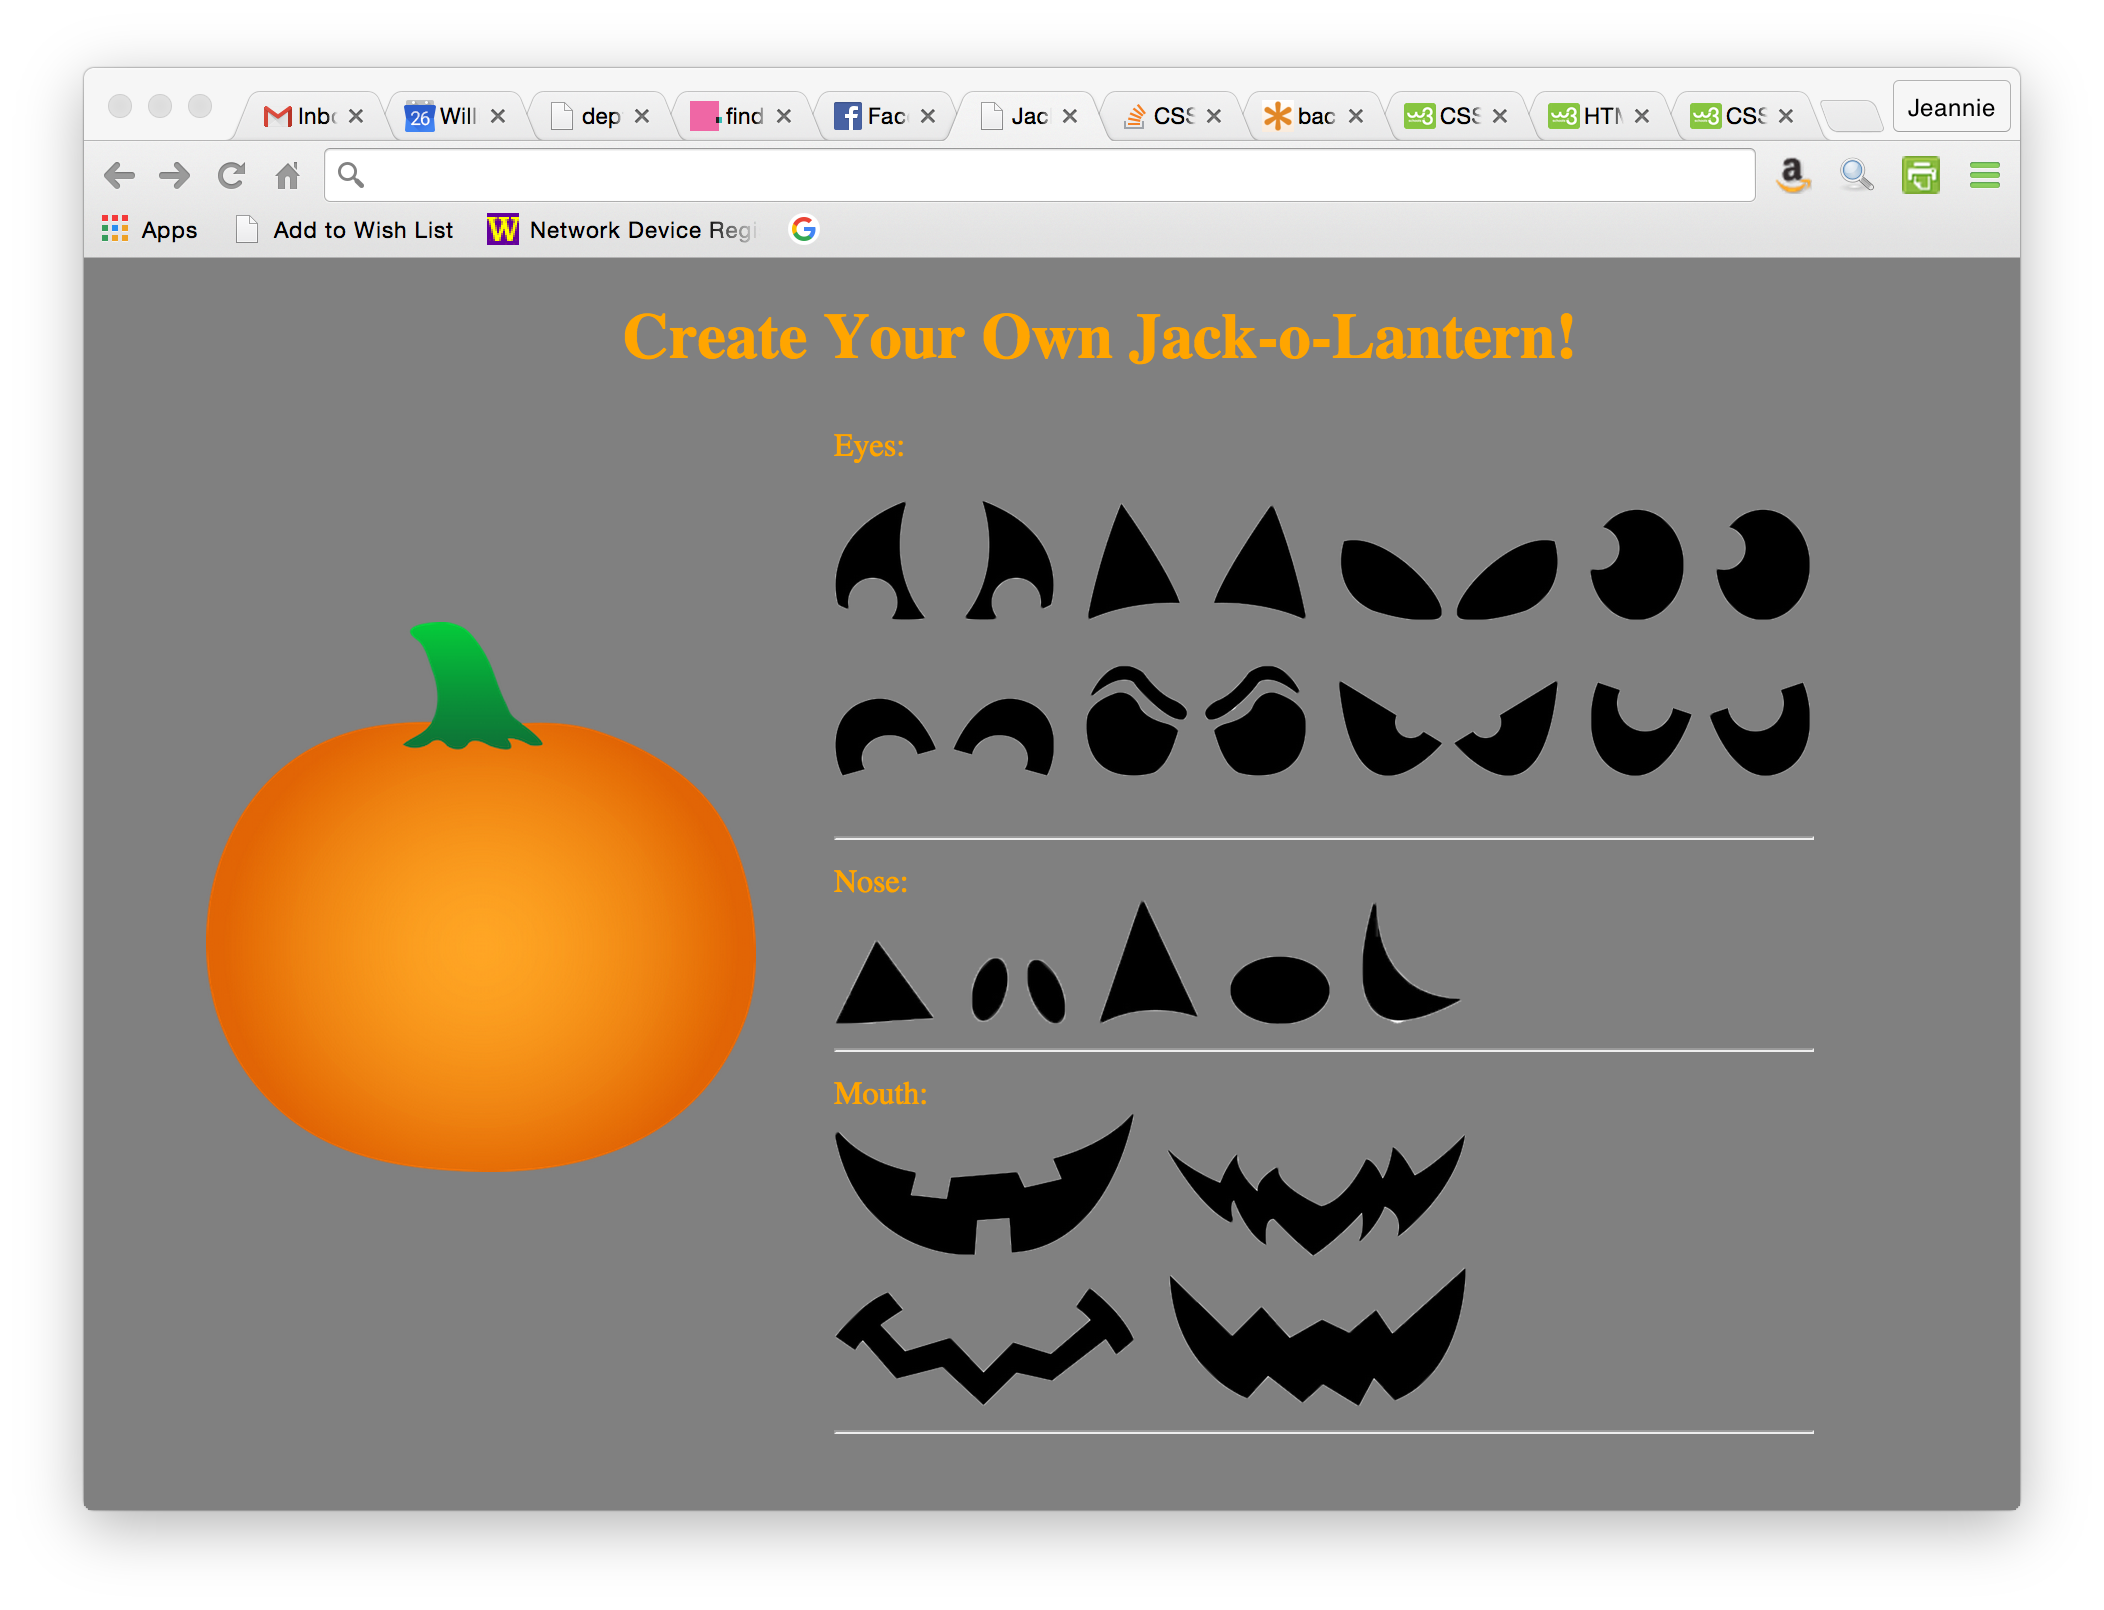
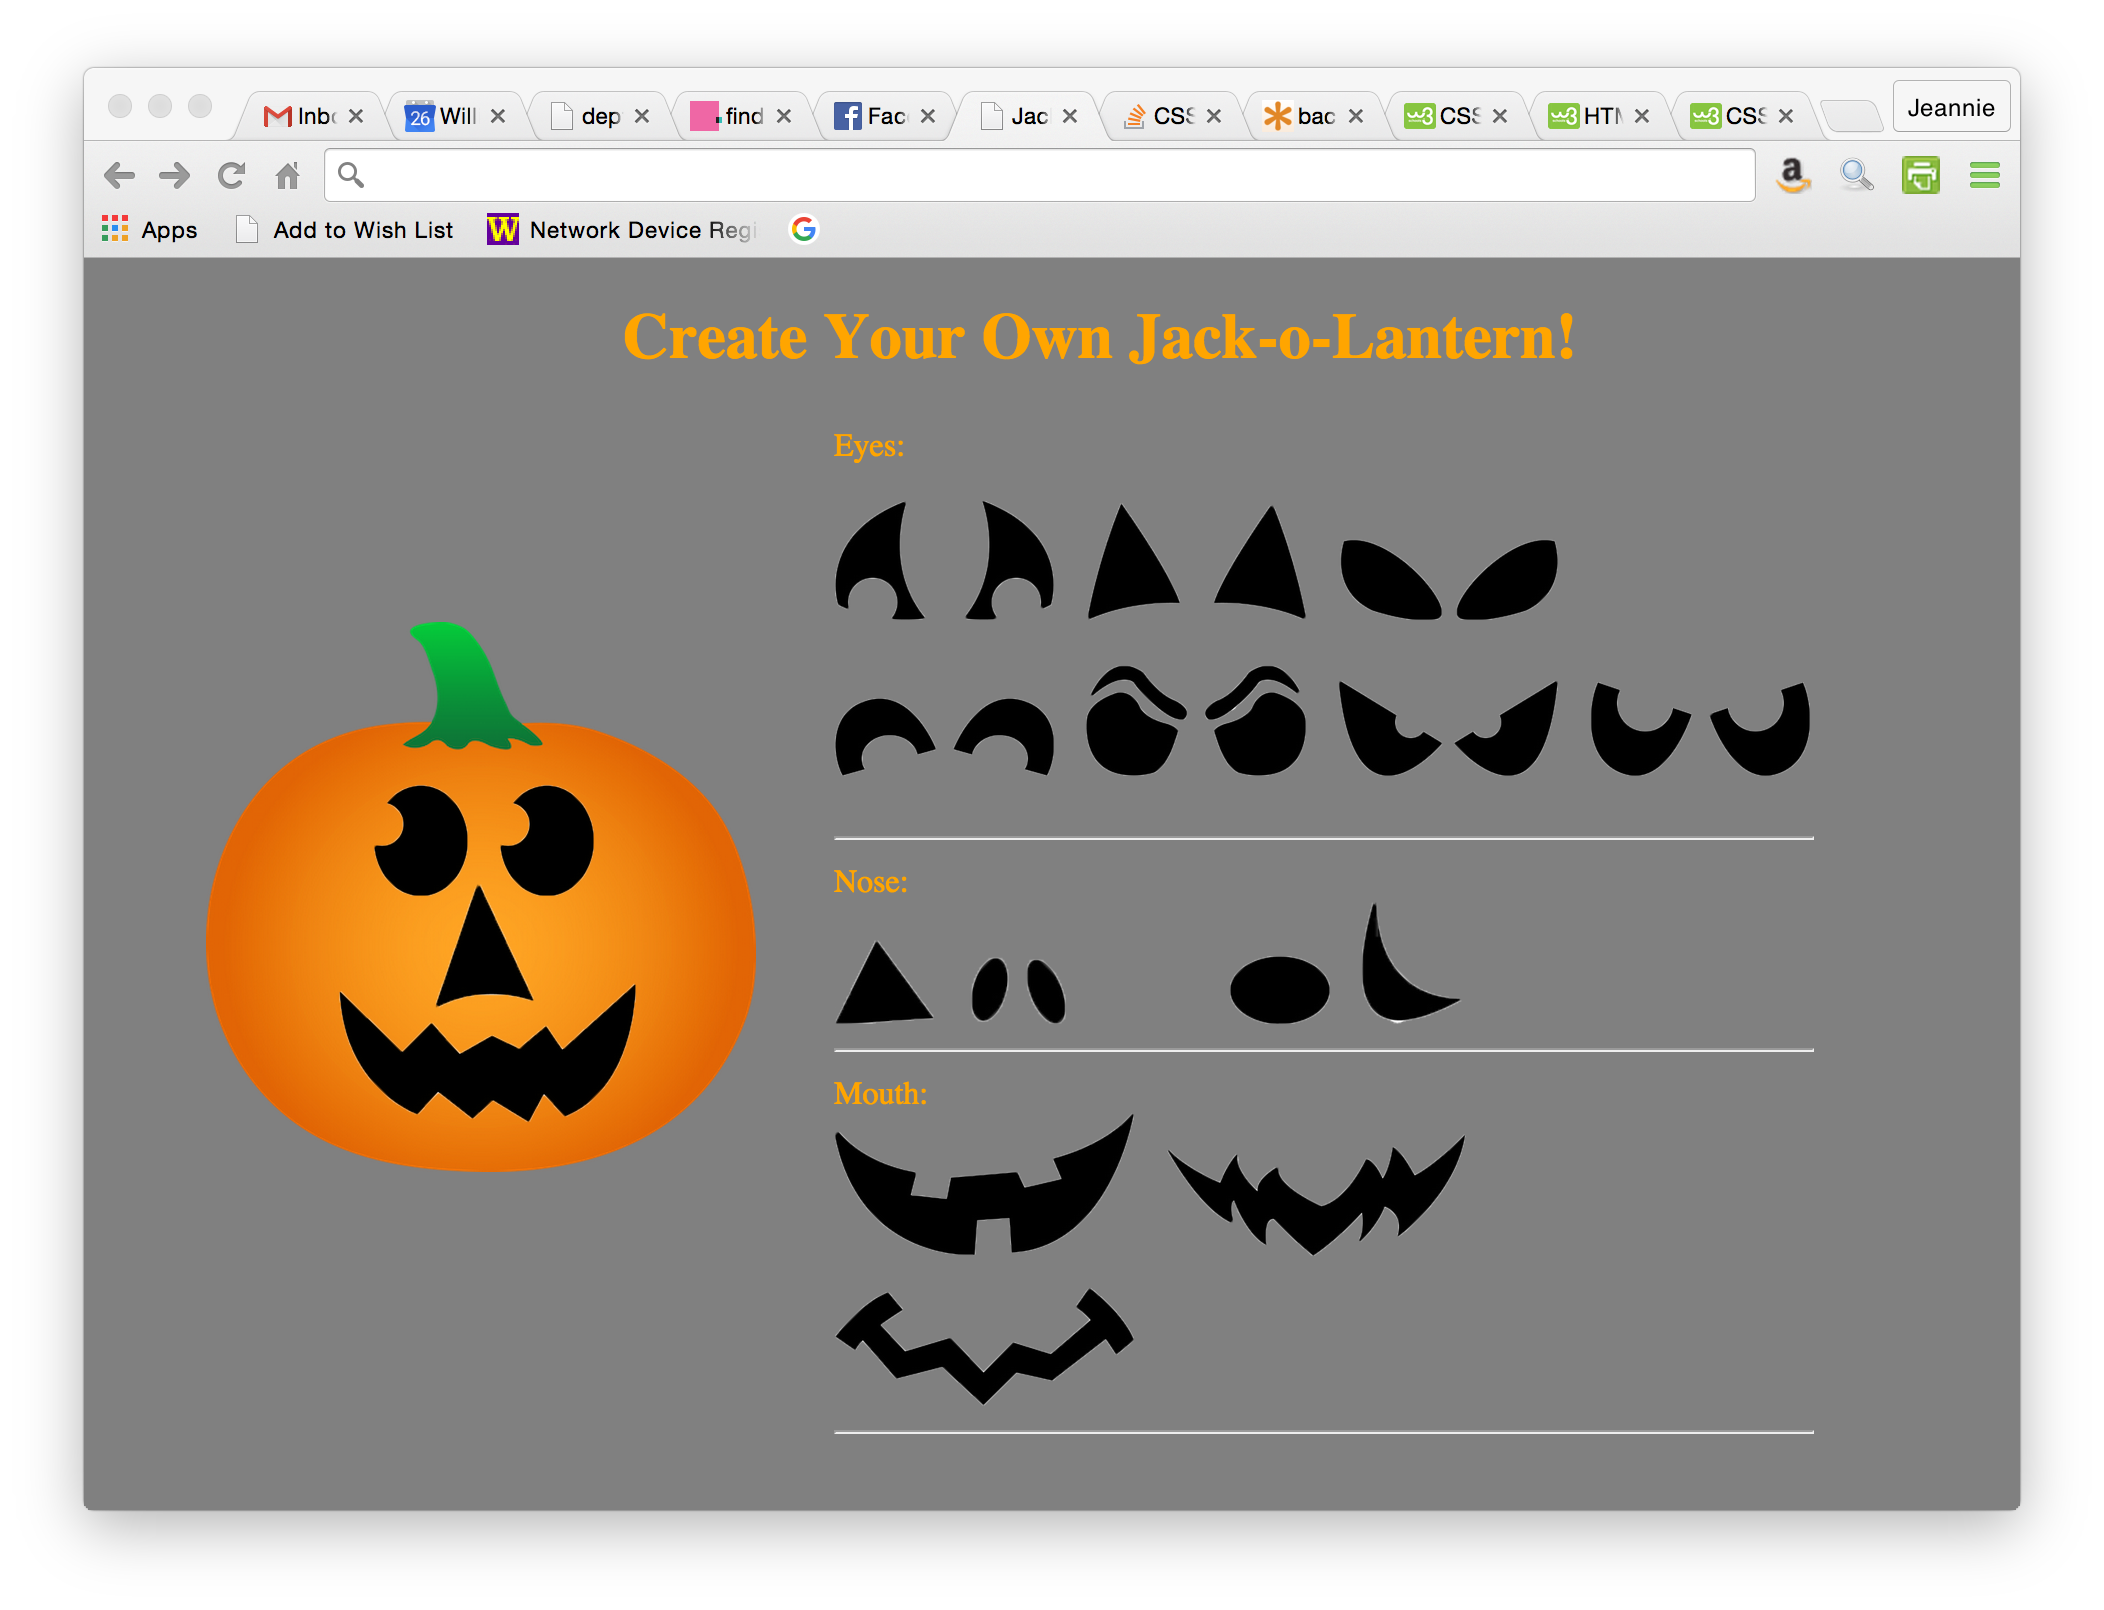
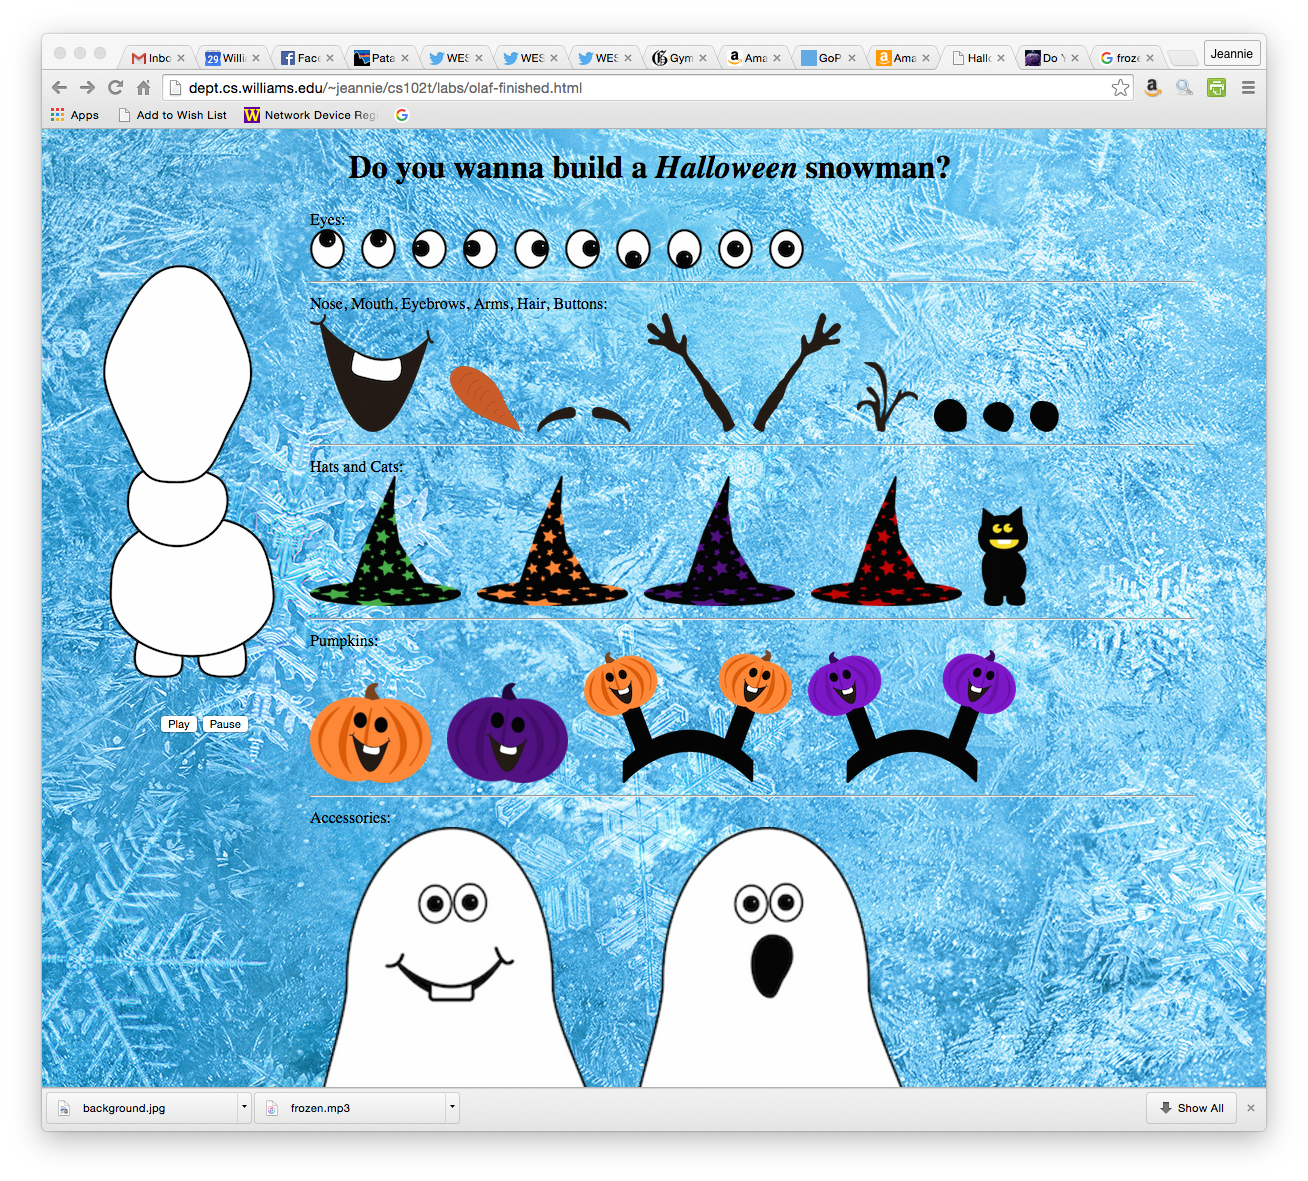
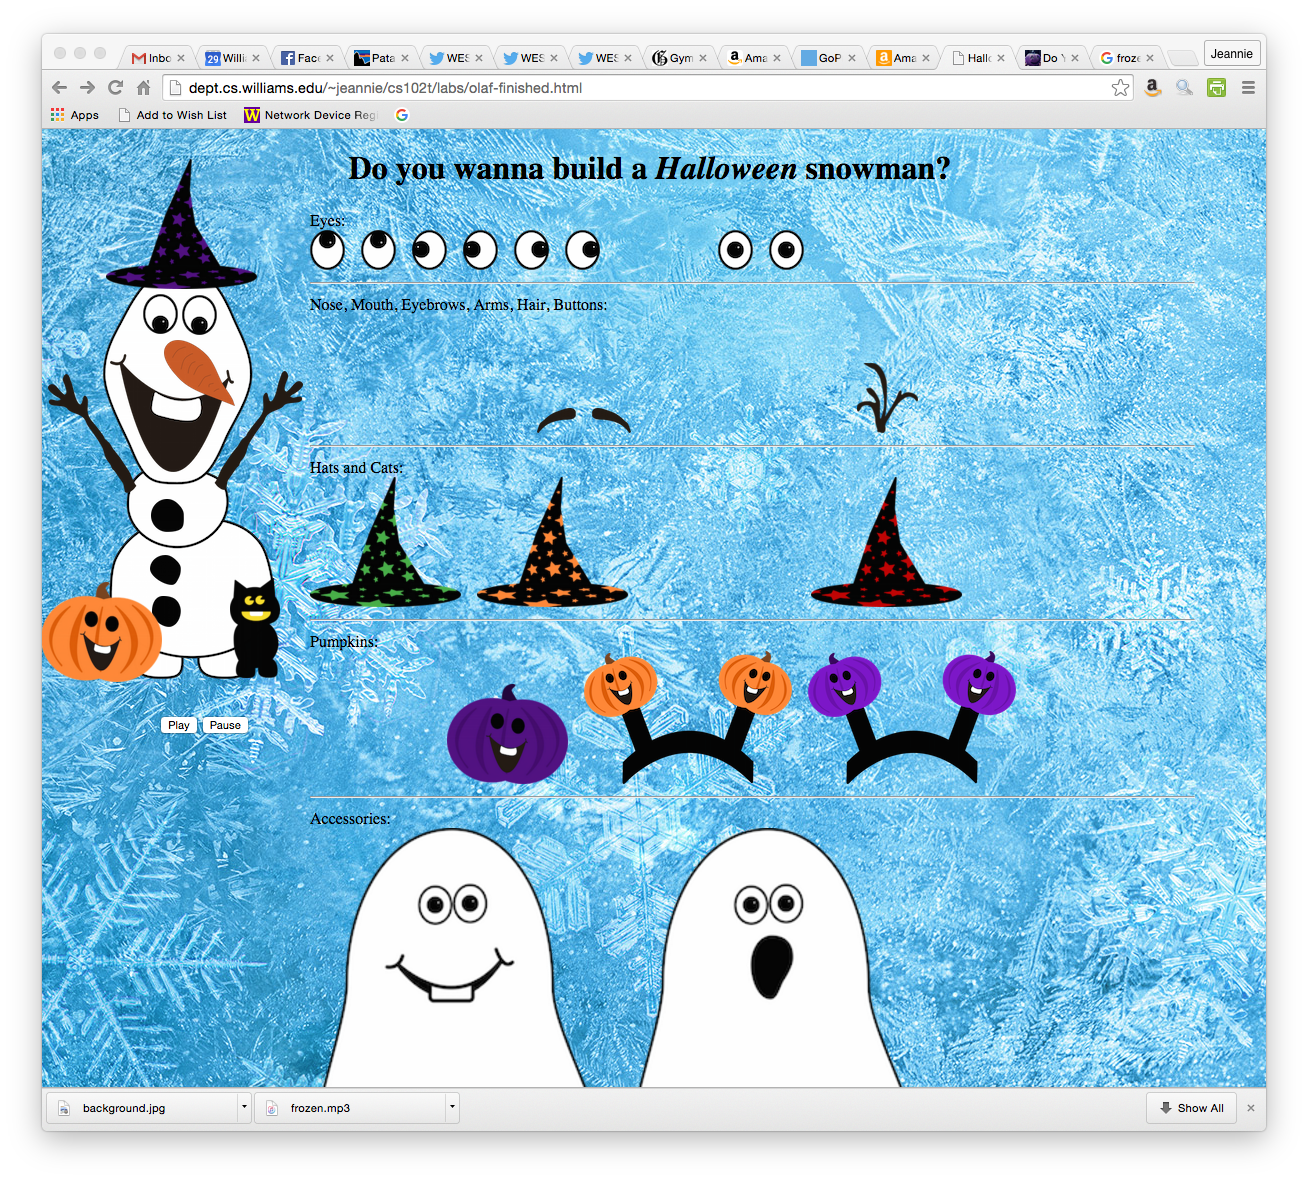
You do not have to make them look exactly like this. These are only samples.
CSCI 102T
The Socio-Techno Web
Home | Schedule | Labs | CS@Williams
Lab 7: More Javascript and jQuery
Exercise 1: Mad Libs with HTML Forms
Recall your Mad Lib webpage from last week. Requiring your friends to respond to a bunch of
prompts (as in Lab 6) is fine, but it can be tedious, and it does not allow them to
go back and change a previous response. In order to support this functionality, you
can use an HTML form with a series of input fields. In this exercise, you will
create a modified version of your madlib.html page that creates the same story using
an HTML form instead of Javascript prompts.
In order to support forms (i.e., text fields with an input button), you need to add
HTML to create the text fields and button, and then a JavaScript function to
manipulate the input text and write the story.
I recommend that you read through this entire exercise before typing anything.
<form name="myForm" >
  First name: <input type="text" name="fname">
  Last name: <input type="text" name="lname">
</form>

<button onclick="submitName()">Submit</button>
<p id="result"></p>
function submitName() {
  	var first=document.forms["myForm"]["fname"].value;
  	var last=document.forms["myForm"]["lname"].value;
  	result.innerHTML = first+" "+last+" is a great person.";
 }
Note from lab: Your final story output (result.innerHTML = ...) will end up being a very long
line of code. You can insert line breaks, however, you have to use the "\" character
inside of quoted text in JavaScript. For example:
result.innerHTML = first+" "+last+" is a great person. This is a really long line of code.";can be rewritten as
result.innerHTML = first+" "+last+" is a great \
person. This is a really long line of code.";
Exercise 2: Hide and Fade
<script src="http://www.cs.williams.edu/~cs102/assignments+labs/jquery/jquery-1.11.3.min.js"></script>This code links a file named jquery-1.11.3.min.js to your web page. When the browser loads your fadeIn.html web page, it also downloads jquery-1.11.3.min.js (a JavaScript file) and runs the code inside it.
<script>
$(document).ready(function() {
    $('body').hide().fadeIn(3000);
});
</script>
Exercise 3: Spinning Images
To rotate images using jQuery, we will use another jQuery library called JQueryRotate.
<script src="http://www.cs.williams.edu/~cs102/assignments+labs/jquery/jquery-1.11.3.min.js"></script>
<script src="http://www.cs.williams.edu/~cs102/assignments+labs/jquery/jQueryRotate.2.3.js"></script>
$("#img").rotate(45);
or
$("#img").rotate({angle:45});
to rotate the image 45 degrees clockwise. Try it and make sure it works.
var angle = 0;
setInterval(function(){
  angle+=3;
  $("#img").rotate(angle);
},50);
Exercise 4: Trick or Treat!
In this week's last exercise, you will learn about the Draggable widget in jQuery. You will create a webpage that allows you to decorate a pumpkin or snowman by dragging eyes, a nose, etc to the correct place.
Before making your pumpkin or snowman, let's first look at a simple example that illustrates how the
drag functionality works with jQuery. We will use the Draggable jQuery widget for enabling dragging on our webpage.
The Draggable widget is very useful. Note: There is another
widget (Droppable) which must be used if you want to both drag and drop. More information
(including a really cool card game tutorial) can be found
here.
Start by downloading smiley.html by Ctrl+clicking and saving the file in your repository. You'll also
need the image files. Download smiley-imgs.zip to your repository directory. Double-click on the zip
file to uncompress the images into their own folder. You should still be in your repository directory. Open smiley.html in a browser
and see how it works.
Now let's look at the code. Open smiley.html in Atom. Look over the code
and try to understand what's going on. Starting from the top, I will explain each part of this file.
<!DOCTYPE html>
<html>
  <head>
   <link rel="stylesheet" href="http://www.cs.williams.edu/~cs102/cs102t.css" type="text/css">
   <meta http-equiv="content-type" content="text/html; charset=UTF-8">
   <title>Smiley</title>

   <script src="http://www.cs.williams.edu/~cs102/assignments+labs/jquery/jquery-1.11.3.min.js"></script>
   <script src="http://www.cs.williams.edu/~cs102/assignments+labs/jquery/jquery-ui-1.11.4/jquery-ui.min.js"></script>
Next we define our style using standard CSS. We could specify this in a separate file, but since there isn't much styling on this simple page, we can just as easily leave it here in the header.
    <style>
	body {
  	  position: relative;
  	  margin-top: 10px;
  	  background: white;
  	  width: 850px;
  	  color: black;
	}

	h1 {
	  margin-left:auto;
	  margin-right:auto;
	  text-align: center;
	}
The next part (still part of our CSS style) defines our background image, which in
this case is a yellow circle. IMPORTANT: We specify this image separately
so that we can't drag it around the page like the rest of our images.
	#face {
 	  background:url("smiley-imgs/yellow-circle.png");
  	  width: 300px;
  	  height: 300px;
  	  margin-left:0px;
	  margin-right:auto;
	}
    </style>
Now we define the function that actually makes our images draggable. This function
gets called as soon as the webpage is loaded in the browser. Using the jQuery function
called draggable(), we set all img objects in our webpage to be draggable.
    <script>
	  $(document).ready(function() {
		  $( "img" ).draggable();
	  });
    </script>
  </head>
Finally, we define the HTML. This includes specifying the #face identifier from
above (which includes our background image), as well as the rest of our face parts.
  <body>
    <h1>Say Cheese!</h1>

    <table>
        <tr align="center">
            <td width="10%">
                <div id="face"></div>
            </td>
            <td>
                <img src="smiley-imgs/mouth.png"><br><br>
                <img src="smiley-imgs/eyes.png">
            </td>
        </tr>
    </table>
  </body>
</html>
Your task is to create a page that is similar to smiley.html (call it jack.html, snowman.html, or olaf.html) that allows someone to decorate their own jack-o-lantern, snowman, or Olaf. I have gathered a bunch of snowman images for you to use from this website. I found some pumpkin ones, too, mostly from here. I collected some really awesome Olaf images from here, complete with Halloween accessories! You may use other ones as well. Just make sure you find or create images with a transparent background.
Tasks for lab