This is a two-week lab and is divided into two parts. You are strongly encouraged to work in pairs, but it is not required.
Part 1 is due date November 13/14 and Part 2 is due on November 20/21.
BoggleCube and
BoggleBoard class.BoggleGame
class.Part 1 will be graded on completion (you must submit something to receive credit for part one, but your grade will not be assessed until the second week). You will receive automated feedback on Part 1, but that feedback will not affect your final lab grade as long as you turn in your implementation of the required classes. You may fix any bugs (without penalty) after the automated feedback, before you turn in the completed lab.
You will receive graded feedback on your the entire lab (Parts 1 and 2) after the Part 2 deadline. This grade will apply to both parts (and count towards two labs).
Note. This lab handout differs from our normal weekly lab in several ways:
It describes important classes and methods, and provides some tips on programming techniques, but unlike previous labs, it will not present a detailed overview of the internal structure of the program. That part of the program’s design will be your responsibility.
Unlike previous labs, there is no runtests.py file
containing automated tests. Instead, we expect you to write your own
testing code inside the if __name__ == "__main__" block of
your python files.
In this lab you will gain experience with creating multiple interdependent classes and using principles of inheritance. Along the way, you will implement a graphical, interactive version of the classic game Boggle.
As we saw in class, a game Board consists of a grid that
holds the game pieces or “cubes”. Suppose the grid has r
rows and c columns and thus can hold s = r x s
cubes. Moreover, suppose each cube has an index between
0, .., s-1. We would like to map this index to a
grid-location on the board using the following order (called
row-major order): 0th cube is in the top
left corner (location (0,0)), 1st cube is to
its left (location (0, 1)), and so on, until we reach the
end of the first row. Then, the next (cth) cube is placed
in the first column of the second row (location (1,0)),
followed by the next column of the second row (location
(1, 1)) and so on, finally finishing with the last cube in
the bottom right corner.
For r = c = 4, the placement below shows the mapping of
s=16 cubes to grid locations in row-major order.
 0   1   2   3
 4   5   6   7
 8   9  10  11
12  13  14  15
Looking at the figure above, we can see that cube 6 is
at row 1 and column 2 (0-indexed, as is
typically done). Similarly, cube 8 is at position
(2,0) and cube 3 is at position
(0,3).
As part of your prelab assignment, write an implementation of the following two functions on a sheet of paper:
index_to_grid(ind, r, c) that given a cube index
ind and number of rows r and columns
c in the grid and returns a tuple
representing the grid location (i, j) of the cube using the
row-major order described above.grid_to_index(coord, r, c) that does the reverse: given
a grid coordinate coord (a row,
col tuple) and number of rows r and columns
c in the grid, it returns an cube index (int)
that maps to that location in row-major order.Hints. You might find arithmetic operations such as
quotient (//) and remainder (%) helpful in
these conversions.
These functions will come in handy when you are implementing methods
in the BoggleBoard class in Part 1 of the lab.
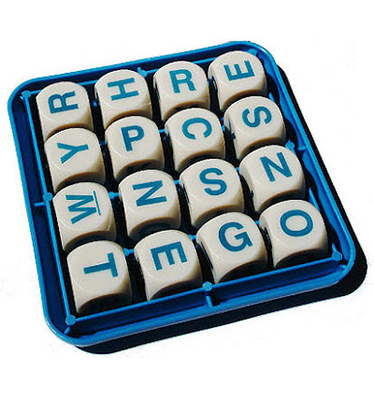
The official rules for Boggle are posted here. In Boggle, players form words by linking together adjacent letters appearing on dice that are arranged in a 4x4 grid. Points are awarded based on the length of the word found, and the player finding words with the highest total score after 3 minutes wins. A picture of a physical version of the game is shown below and the version that we will be implementing is shown below it.
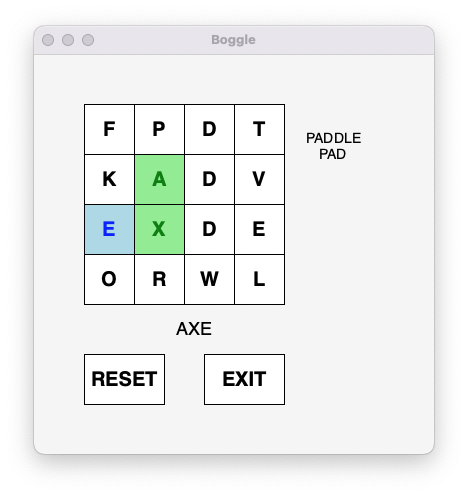
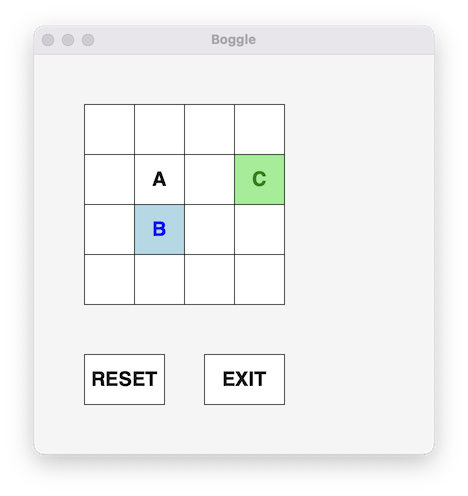
The screenshot above shows the most important elements of the user
interface. Instead of physical dice, we use a
4x4 grid of cubes labeled with letters. In
this single-player version, when the player identifies a group of
letters that form a word, they enter the word by clicking the
appropriate cubes in the order that the letters appear in the word. The
letters of the word currently being entered are displayed
below the grid in the program window. In the example
shown, the letters AXE appear below the grid, indicating
that the buttons labeled A, X and
E have been clicked in that order.
In your version, you are welcome to customize the game with different colors and fonts (but please adhere to the colors specified in the “Creating a word” section).
Below we give an overview of the main features of the game you will implement.
In the figure above, you may notice that the letters A
and X are displayed in green while the letter
E is displayed in blue. In our implementation,
the most recently clicked letter is displayed in blue
and all other letters clicked while entering the current word
are displayed in green. If the next letter clicked is
adjacent to the last one (i.e., the one displaying a
blue letter) and if the letter is not already included in the current
word (i.e., it is white with black text rather than green), then that
letter is added to the current word. The letter that had been displayed
in blue becomes green and the letter that was most recently added
becomes blue. The word in progress is displayed (as text) below the
board. Your game should provide similar feedback as letters are clicked
and words are completed.
To indicate that a complete word has been entered, the player clicks a second time on the last (blue) letter of the word. The program then checks to make sure the word is (1) at least three letters long, (2) has not previously been entered, and (3) is a valid word (using the provided dictionary). If it passes these three tests then the word is added to the collection of words the player has found, and the text area to the right of the grid is updated to include the word.
The player can indicate that a mistake has been made and there is no apparent way to complete the word by clicking any non-adjacent letter of the blue letter. Doing this will reset the colors of all of the selected letters to black text with white background, and clear the word in progress shown below the grid, allowing the player to start over by clicking the first letter of a new word.
The components at the bottom of our program’s window are used to
control when games start and end. If the RESET button is
pressed, the program randomizes the letters displayed on the boggle
cubes (described below), clears all words and text areas, and begins a
new game. If the EXIT button is pressed, the game ends and
the window closes.
When your program first starts, or whenever a player presses the
RESET button, your code should randomize the letters shown
in the grid of buttons representing the Boggle cubes. The game of Boggle
uses a set of cubes labeled with letters in a way that is intended to
yield a nice mix of consonants and vowels when the Boggle box is shaken
to randomize the letters. To make your game resemble the original, your
program should choose the letters displayed based on the letters
appearing on the actual Boggle cubes. To do this, you will use the
provided brandom.py Python random module, which has
functions for picking a random integer and for shuffling the contents of
a list. This algorithm is described in detail below.
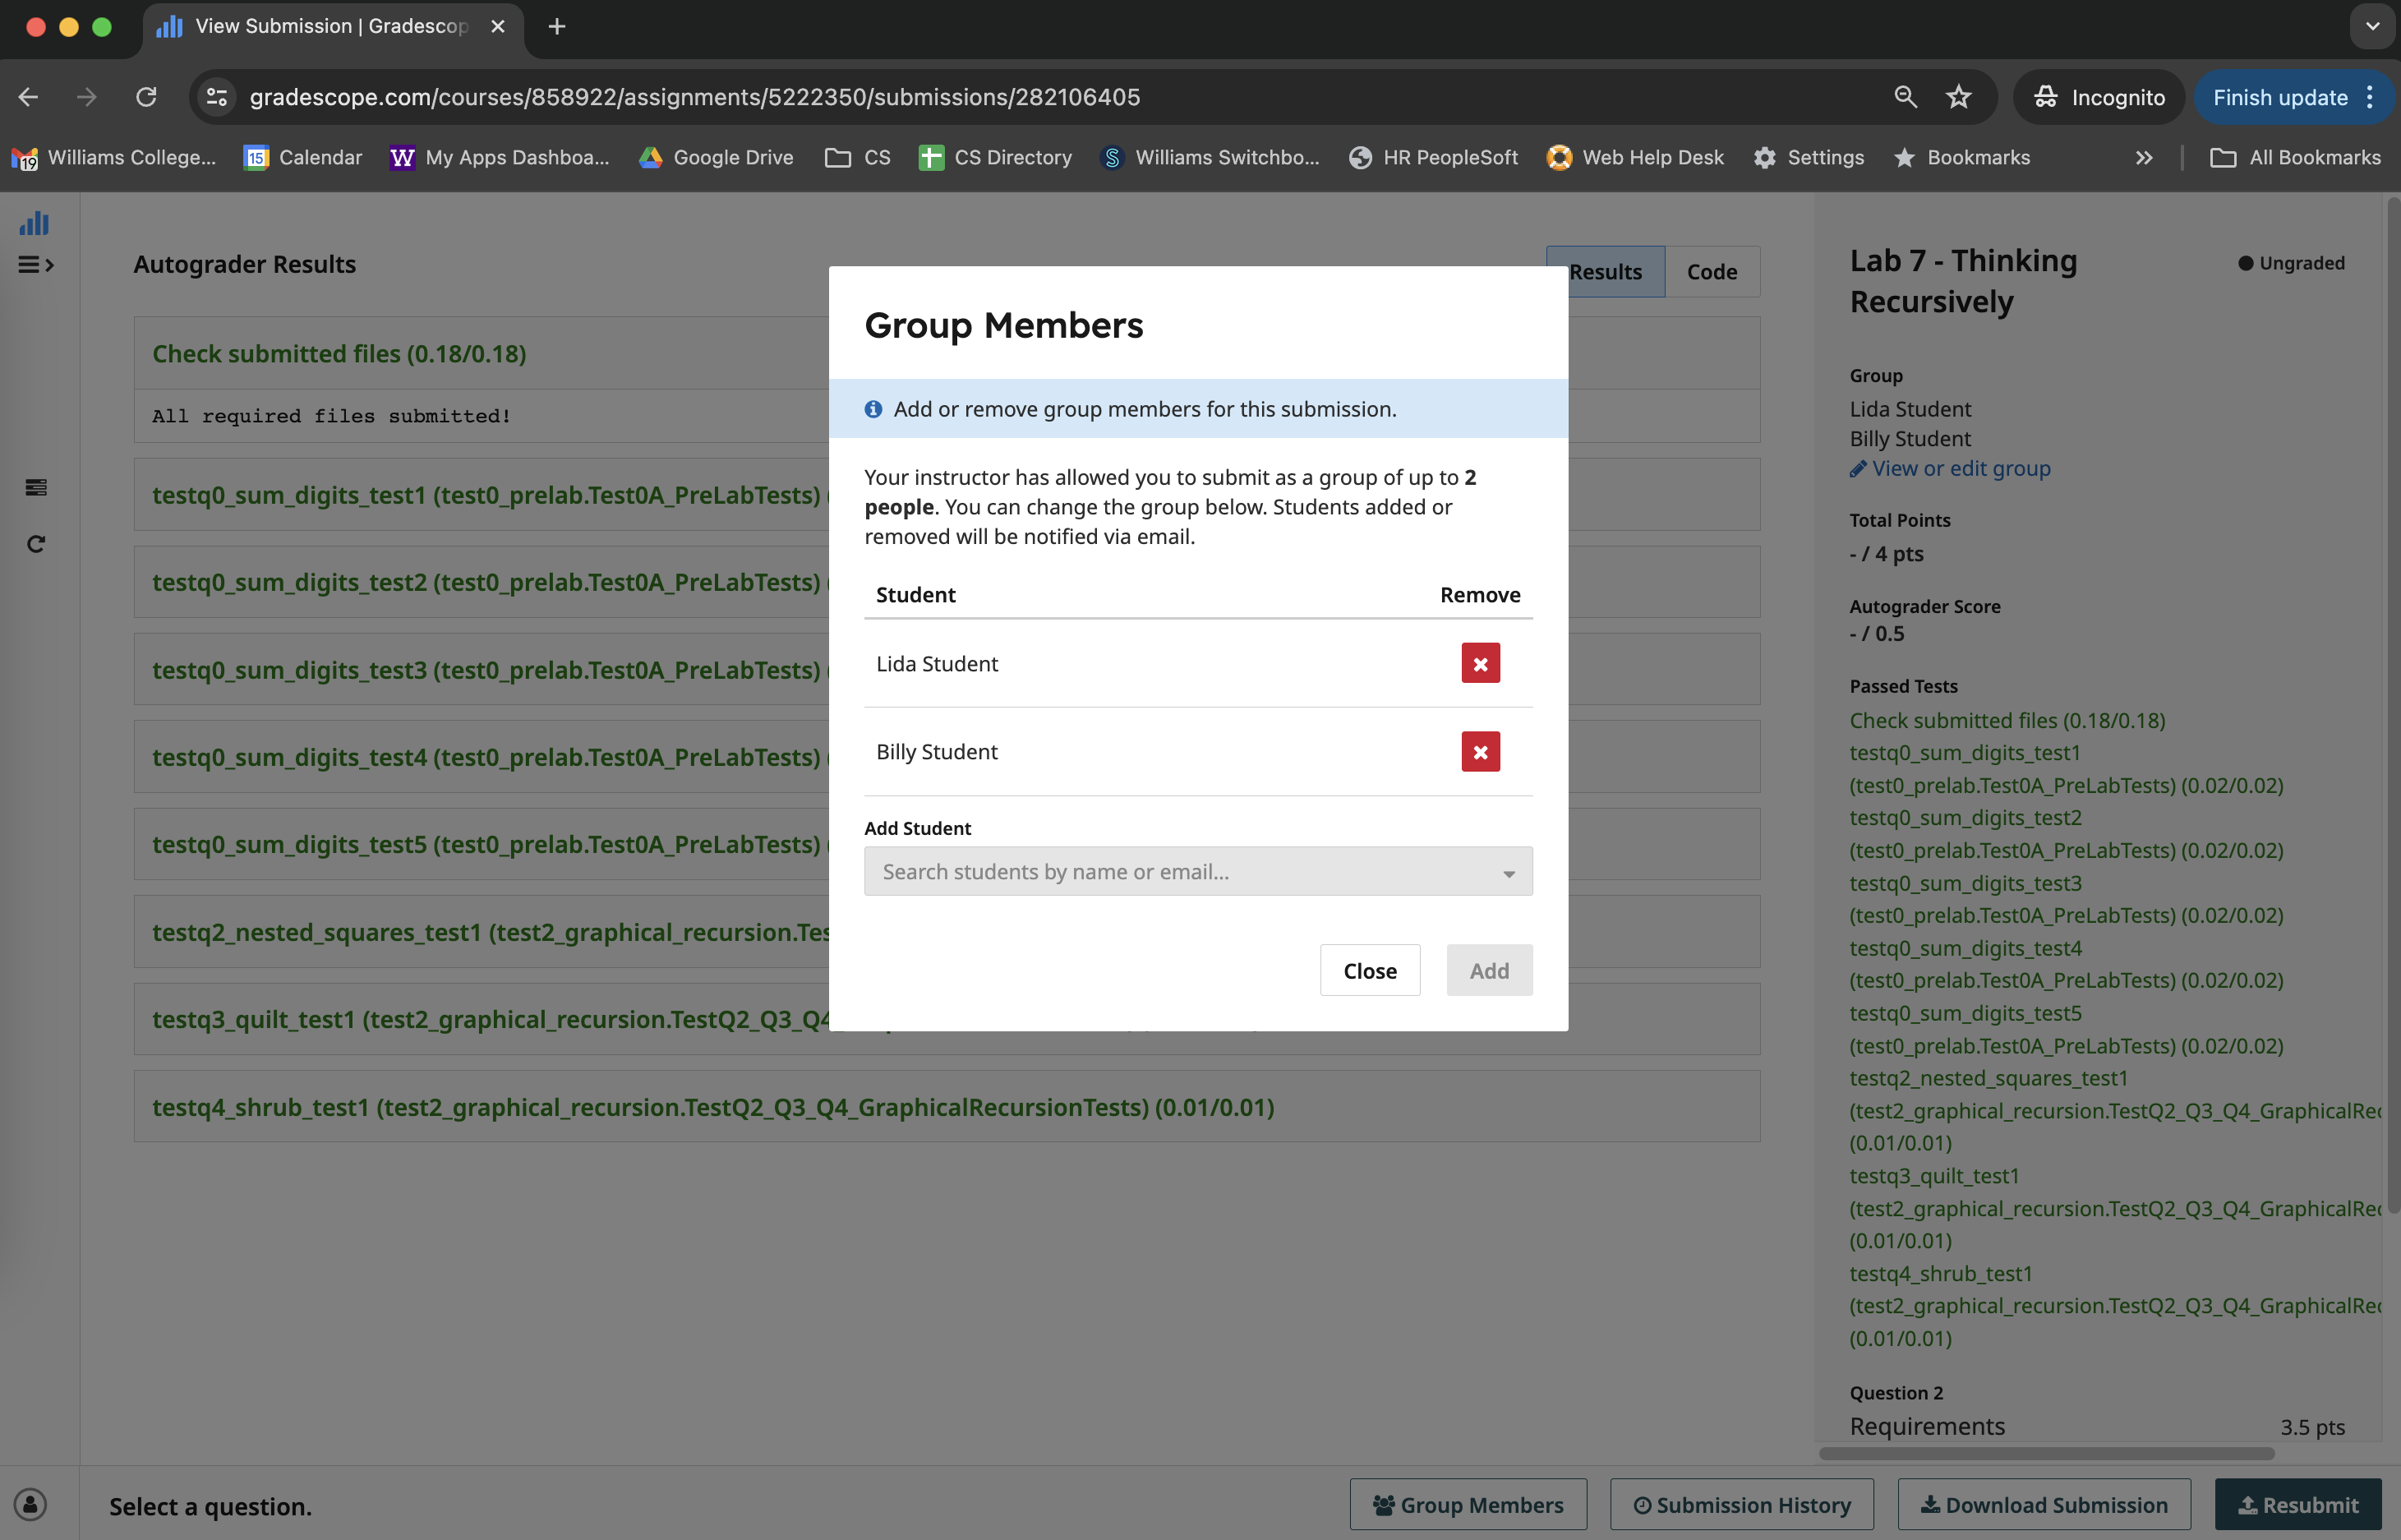
Using the form provided, you may have designated up to one partner that you will work with, side-by-side, through all stages of the main assignment. To facilitate this collaboration, we created one code repository per group. All graded work must be done within this repository. At the end of this document, there are additional instructions that describe the group submission logistics on the gradescope platform.
If you are working individually, you can ignore those extra steps. All lab logistics for independent submissions remain the same as they have been during prior labs.
Clone the lab resources from the GitLab repository, as usual:
git clone https://evolene.cs.williams.edu/cs134-labs/23xyz3/lab09.gitwhere your CS username replaces 23xyz3. If you are
working with a partner, you replace this with your CS username and your
partner’s CS username, sorted, and separated by a - (e.g.,
23xyz3-24abc2). The description of the files provided in
the starter is available in README.md and discussed
below.
graphics.py ModuleWe have provided you with a simple graphics library for implementing
the game, graphics.py. This is the same module we used in
class to implement Tic-Tac-Toe. You should not edit this
module. We have provided an overview of relevant classes and
methods here.
Board ClassThe Board class in board.py is similar to
the base class we developed in lecture to implement our Tic-Tac-Toe
game. The Board creates a grid of text rectangles, with the
default row, column, and size values appropriately set for a Tic-Tac-Toe
game. (You will need to specify different row and column values when you
instantiate a new board for a game of Boggle.) The Board
class also allows us to draw an EXIT and RESET button, and it provides
methods for checking for clicks inside of those buttons. There are
methods for manipulating the text above, below, and to the right of the
grid as well. Spend some time reviewing the Board class if
necessary, but do not make any changes to it. When we
evaluate your code, we will use the version of board.py
that was included in the starter code, so any changes you make will not
be considered.
Even though we used the Board class for Tic-Tac-Toe,
there are some differences between the boards for the two games. Thus,
just as we did for Tic-Tac-Toe, you will extend the Board
class to leverage the existing code and customize it as needed for
Boggle in the BoggleBoard class that you will implement
inside the file boggleboard.py. You can take advantage of
the helper methods provided in Board for converting between
window coordinates and grid locations. Remember, by inheriting from the
Board class, your subclass BoggleBoard will
have access to all of those methods. That’s the beauty of
inheritance!
Since we discussed the Board class in lecture as we
developed our Tic-Tac-Toe game, we do not provide a detailed discussion
of individual methods here. You should review the code and lecture
materials to make sure you understand how to use it. We do provide a
sample usage of the Board class in the
if __name__ == "__main__" block of code at the bottom of
board.py. This sample code shows how to use some of the
provided methods for working with mouse clicks. You can run it by
typing:
python3 board.pyYou can also see documentation of the Board class by
typing the following (note that you can type “q” to quit when finished
looking to get back to your Terminal):
pydoc3 boardNote: while you must not modify the
code that implements the board.py methods, we do encourage
you to edit the if __name__ == "__main__" code block in
order to explore the methods and get a feel for how the
Board class works! Since the
if __name__ == "__main__" code block is only executed when
board.py is run as a script, the code inside it does not
affect the rest of your program.
BoggleCube
ClassStart by implementing the BoggleCube class in
bogglecube.py. This class implements the functionality of a
single letter cube in Boggle. A BoggleCube is minimally
defined by:
"QU", each face is represented by a single letter)We have provided some method headers and some comments to help you
get started. Think about what attributes and methods are required to
capture the state of a single BoggleCube. We have filled in
some of the required attributes in __slots__ (you
must keep these attributes) but you may choose to add
more. Similarly, you should not change any existing method
names/arguments or expected behaviors, but feel free to add
more helper methods as needed.
Complete the method implementations in the file
bogglecube.py by replacing
pass # replace this line with your code with your own
implementation. Note that the randomize() method may
require methods from the provided brandom module. Reading
through that module may give you some ideas, but more details are
provided later in the Shaking
Cubes section. You may wish to defer implementing
randomize() until then.
| BoggleCube Method | Behavior |
|---|---|
__init__(self, faces, face_index=0) |
initializes the attributes of the class |
get_letter(self) |
getter for the string on the visible face of the
BoggleCube |
randomize(self) |
“shakes” the BoggleCube by setting one
of the possible faces at random to be the visible face |
__str__(self) |
returns a descriptive string representation of a
BoggleCube |
__repr__(self) |
returns a succinct string representation of a
BoggleCube for interactive testing |
The if __name__ == "__main__:" block of
bogglecube.py contains the following testing code:
from board import Board
win = GraphWin("Boggle", 400, 400)
n = 4
board = Board(win, rows=n, cols=n)

# Make three BoggleCube objects to place on the board
cube1 = BoggleCube(("A", "A", "C", "I", "O", "T"))
cube2 = BoggleCube(("B", "Y", "A", "B", "I", "L"))
cube3 = BoggleCube(("C", "A", "D", "E", "M", "P"))

# Update the board with the letter A, but leave default colors
board.set_grid_cell(1,1, cube1.get_letter())

# Update the board with the letter B, and change colors to "blue"
board.set_grid_cell(2,1, cube2.get_letter(), "blue", "powder blue")

# Update a TextRect with the letter C, and change colors to "green"
board.set_grid_cell(1,3, cube3.get_letter(), "green", "DarkSeaGreen1")

# Make the initialized board appear within the window
board.draw_board()

# pause for mouse click before exiting
point = win.getMouse()
win.close()
This code creates a Board and three
BoggleCubes and places them on the grid. Running the file
bogglecube.py as a script, should produce the following
BoggleCubes in your Board window:
We have also provided suggested tests and expected outputs in the
documentation of some of the methods. We strongly encourage
you to add/modify testing code inside the
if __name__ == "__main__" code block to be sure that each
of your methods behave as expected. Ensure that your
BoggleCube class is working completely before moving on to
the next part.
BoggleBoard
ClassAfter completing your BoggleCube implementation, move on
to the BoggleBoard class in boggleboard.py.
This class inherits from the Board class, just as the
Tic-Tac-Toe Board inherits from Board in the example from
lecture.
The BoggleBoard inherits its _grid
attribute from Board, which is made up of
cells of TextRect objects. The
TextRect class is defined in the graphics module and we use
it to display the BoggleCubes on the grid. This
_grid represents the play area and is a nested list where
the “outer list” stores Board._rows inner lists and each
“inner list” has Board._col cells.
The BoggleBoard class extends the Board
class by adding a new attribute _cubes that is a
one-dimensional list of BoggleCubes that will be placed on
the cells of the grid.
In addition to utilizing these attributes and methods inherited from
Board, you should implement several additional methods that
are specific to Boggle. As before, do not change any existing method
names/parameters, but feel free to add additional attributes to
__slots__ and add additional methods as needed. Minimally,
a BoggleBoard will need functionality to initialize the
board, reset the board, and randomize the cubes placed on it using
the shake_cubes() method.
Ultimately, you must complete the following methods provided in the
file boggleboard.py by replacing
pass # replace this line with your code with your own
implementation. Additional details about some of those methods can be
found in the rest of this section (after the table).
| BoggleBoard Method | Behavior |
|---|---|
__init__(self, win) |
initializes the inherited attributes of the super class
(Board) by passing a graphical window win of
type GraphWin; also initialize an attribute _cubes which is
a list of BoggleCubes; calls
place_cubes_on_board method to display initial board |
_which_row(self, cube_index),_which_col(self, cube_index),_which_cube(self, row, col) |
helper methods to convert between grid positions and cube indices using row-major order (based on the prelab question) |
get_bogglecube_at_point(self, point) |
returns the BoggleCube object at given location on the
screen (Should also check to make sure the point is in the grid. Return
None if not) |
get_bogglecube_coords(self, bogglecube) |
returns a (row,col) tuple that corresponds to the
location where bogglecube is mapped to on the grid (return
(-1, -1) if it is not found) |
shake_cubes(self) |
implements the algorithm below to simulate shaking the Boggle cubes |
is_adjacent(self, cube1, cube2) |
checks whether two BoggleCubes, cube1 and
cube2, have adjacent coordinates on the board’s grid |
reset(self) |
clears all state to start a new game: resets grid graphics, clears all text areas (right, upper, and lower) on board |
__str__(self) |
returns the appropriate string representation of a
BoggleBoard |
BoggleCubes to Grid LocationThe BoggleBoard class stores individual letter cubes in
a one-dimensional list of BoggleCube objects using the
attribute _cubes. How do we know which grid position (a
(row, col) tuple) that a particular cube (a single integer
i) should correspond to?
Notice that the Board._grid has 4x4=16 cells (each
stores a TextRect element), and the
BoggleBoard._cubes list contains 16 BoggleCube
elements. They have the same number of elements arranged differently! We
will need a way to map from an index i in our
BoggleBoard._cubes list to a tuple (row, col)
in our Board._grid nested list. We will do this using the
row-major ordering described in the prelab.
Use the functions you write as part of the prelab as a guide when you
implement the BoggleBoard class’s helper methods:
_which_row(self, cube_index),_which_col(self, cube_index), and_which_cube(self, row, col)The first two methods take the index of a cube from the
BoggleBoard._cubes list and tell us what row and column
that cube should be placed at within the nested list
Board._grid. The last method “inverts” this process: it
takes a row and a column in the grid, and it tells us what index in the
cube list holds the corresponding cube. Note that these methods each
take different arguments than the prelab functions you write. As you
implement these methods, note that you have access to all the attributes
of the BoggleBoard object that they are called on by using
the self parameter.
Our starter code provides a constant value CUBE_FACES as
follows:
CUBE_FACES = [("A", "A", "C", "I", "O", "T"),  # cube 0
              ("T", "Y", "A", "B", "I", "L"),  # cube 1
              ("J", "M", "O", "QU", "A", "B"), # cube 2
              ("A", "C", "D", "E", "M", "P"),  # cube 3
              ("A", "C", "E", "L", "S", "R"),  # cube 4
              ("A", "D", "E", "N", "V", "Z"),  # cube 5
              ("A", "H", "M", "O", "R", "S"),  # cube 6
              ("B", "F", "I", "O", "R", "X"),  # cube 7
              ("D", "E", "N", "O", "S", "W"),  # cube 8
              ("D", "K", "N", "O", "T", "U"),  # cube 9
              ("E", "E", "F", "H", "I", "Y"),  # cube 10
              ("E", "G", "I", "N", "T", "V"),  # cube 11
              ("E", "G", "K", "L", "U", "Y"),  # cube 12
              ("E", "H", "I", "N", "P", "S"),  # cube 13
              ("E", "L", "P", "S", "T", "U"),  # cube 14
              ("G", "I", "L", "R", "U", "W")]  # cube 15
This definition associates the name CUBE_FACES with a
list of tuples of strings. The BoggleBoard Class assumes
that the Boggle board has 4 rows and 4 columns
(thus has 16 cubes on it). Thus, CUBE_FACES
contains 16 tuples (one for each letter cube on the grid), and each
tuple has 6 strings (since a cube has 6 faces). Given this, you should
create a BoggleCube from each element of
CUBE_FACES to represent the 16 cubes included in the real
Boggle game.
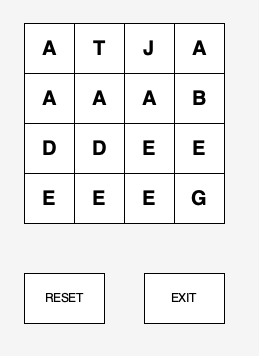
Initially, if a BoggleBoard is created using the first
cube face from each element in the CUBE_FACES list, and it
assigns these letters to the 16 TextRect objects in
_grid using the row-major order, the board would look like
this:
Of course, if we assigned letters in this way, we would always end up
with the same board. We can begin to randomize the board by to “shaking”
the cubes, that is, choosing a random letter from each cube.
(And luckily, our BoggleCube class has a
randomize() method, which sets a random cube face to be the
visible face). So, the letter at grid cell (0,0) is drawing randomly
from ("A", "A", "C", "I", "O", "T"), the letter at grid
cell (0,1) is drawn from ("T", "Y", "A", "B", "I", "L"),
and the letter at (3,3) is drawn from
("G", "I", "L", "R", "U", "W") and so on. That gives us
many different possible boards, but it still isn’t random enough! For
example, it is impossible to have a "B" in grid cell (0,0)
since the first cube does not contain that letter. This motivates an
additional step: we’ll shuffle the order of cubes in the
_cubes list. After shuffling, any of the 16
cubes may be any index in the list. That means that when we subsequently
assign cube letters to grid cells, both the choice of cube and the
choice of side for each cube will be random.
We provide several helper functions in brandom.py to
help you generate random integers within a range and shuffle the
elements in a list. Our brandom functions are designed to
produce the same result every time you run your program. That is, the
board you generate will always be the same. While that helps for
debugging, it makes for a boring game to play! To make your program
generate different boards on each run, add a call to
randomize() in the if __name__ == "__main__:"
part of your code.
Testing Hints.
'J' and 'QU' only appear once on
the Boggle cubes and they appear on the same Boggle cube. So, if your
shake_cubes method ever generates a game board with two
'J's or two 'QU's or one of each, you did not
implement the randomization process correctly.is_adjacent). You may want to test these in
interactive Python or by adding calls to it in
if __name__ == "__main__". Note that
is_adjacent method requires two BoggleCubes as
arguments, so for testing, you may want to add a getter method that
returns the cube stored in a particular grid cell.Just like bogglecube.py, we have provided method headers
and docstrings to guide your thinking. At the bottom of the starter
code, in the if __name__ == "__main__:" block, we have
provided some simple code that you can use for testing your class. You
should use that code (and supplement it!) to test your class before
moving on.
Once complete, the test code should produce a
BoggleBoard in your game window (your letter arrangement
will likely be different):
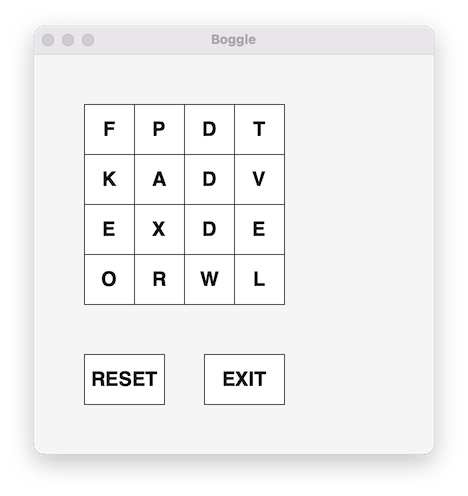
As you click on letters in the grid, you should see information about the grid location displayed in the Terminal. Even though this looks like a functioning Boggle game, it won’t quite work as expected yet. But you’re getting closer!
Note: To have your code produce different boards
each time, you must add a call to randomize() at the start
of your if __name__ == "__main__:" block. However, don’t do
that until you have mostly completed your code, or it will be much
harder to test and debug!
This is the end of Part 1 of the Lab.
You will not be assigned a grade based on the correctness of the code you submit for part one yet. However, this code will be part of your final submission, so keeping the lab guidelines present in mind will save time later. So, some things to keep in mind:
Subclasses should make use of the methods and attributes available via their superclass. Avoid repetitive code that duplicates what the superclass does!
Similarly, do not write redundant code that has already been implemented in a different class: make use of your classes and helper methods/functions effectively.
Just like previous labs, we require that the existing functions, methods, and attributes provided in starter code follow our specifications exactly. Do not modify the method names, their parameters, nor what is returned. You are always free to add new methods and attributes if you find that the provided methods are not enough!
Test your code as you go, using
if __name__ == "__main__" or interactively, to simplify
debugging. The longer you wait before testing, the harder it is to
diagnose errors! Incremental debugging is best.
Near the bottom of the README.md, there is a
breakdown of the grading expectations that will form the basis of your
lab’s evaluation. Please keep these in mind as you work through your
lab!
Download a .zip archive of your work. Download
your assignment files for submission by going to your lab repository on
Gitlab, selecting the Download source code icon (a down
arrow), and select zip. Doing so should download all of
your lab files into a single zip archive as lab09-main.zip,
and place it inside your Downloads folder (or to whichever folder is set
as your browser’s default download location).
Submit your work. Navigate to the CS134 course on Gradescope. On your Dashboard, select the appropriate Lab Assignment. Drag and Drop your downloaded zip archive of the Lab Assignment from the previous step, and select ‘Upload’.