
In this lab you will gain experience with recursion and recursive thinking. Recursion is a powerful design technique. As is the case with any new technique, it takes a bit of practice to master recursion. In this lab, we will concentrate on a variety of recursion problems. The goal of this lab is to practice writing recursive programs and to train our brains to think recursively.
When writing a recursive function, always start with one or more base cases. These are problems that are so small that we can solve them directly. Then, write the recursive cases. There are two parts to each recursive case:
Before you begin, clone this week’s repository using:
https://evolene.cs.williams.edu/cs134-labs/usernameA-usernameB/lab07.gitwhere usernameA-usernameB are you and your partner’s
usernames sorted alphabetically. If you do not have a partner just use
your own username.
This week, you will solve five problems using recursion:
All code should go into recursive.py.
Using the form provided, you may have designated up to one partner that you will work with, side-by-side, through all stages of the main assignment. To facilitate this collaboration, we created one code repository per group. All graded work must be done within this repository. At the end of this document, there are additional instructions that describe the group submission logistics on the gradescope platform.
If you are working individually, you can ignore those extra steps. All lab logistics for independent submissions remain the same as they have been during prior labs.
This pre-lab task is an individual assignment. You must to write (or print) this function on a sheet of paper and submit it at the start of your lab session. Note that this is a departure from previous labs. We will be collecting the physical documents at the start of lab.
Once you have submitted your prelab assignment at the start of the lab, you should discuss you approach with your partner and come up with a joint solution.
In this task, you will write the sum_digits function in
the file recursive.py. The sum_digits function
takes a non-negative integer num as input and computes and
returns the sum of the digits of num.
Your function should be recursive and it should not use any
loops. You are also not allowed to change the type of
num from an integer to a string. Here are examples
of how your function should behave in interactive Python:
>>> print(sum_digits(0))
0
>>> print(sum_digits(90))
9
>>> print(sum_digits(889832))
38
>>> print(sum_digits(1234567890))
45
Consider some specific examples:
num allow us to know the answer
immediately? These qualities define the base case(s):
sum_digits(1) returns 1sum_digits(8) returns 8sum_digits(178):
sum_digits(178) returns
sum_digits(17) + 8sum_digits(17) returns
sum_digits(1) + 7sum_digits(1) we know the answer of already!Walking through this example hopefully clarifies our recursive step.
Given an integer num that does not meet your base case
criteria, your recursive case should separate it into
two parts using arithmetic operators:
num, andnum.Hint: Think about how you can use the arithmetic operators to extract digits. This may be a situation where the modulo operator (%) comes in handy!
Bedtime stories follow a common pattern across cultures where a simple phrase repeats multiple times in a nested fashion. For example,
The mother of the parrot told a story about a cow...
    The mother of the cow told a story about a flamingo...
        The mother of the flamingo told a story about a heron...
        and then the flamingo fell asleep.
    and then the cow fell asleep.
and then the parrot fell asleep.
Write a function called bedtime_story which takes a list
of strings list_of_characters and returns a list of
strings representing the lines of a bedtime story as above. The
above story shows the output of
bedtime_story(['parrot', 'cow', 'flamingo', 'heron']), with
some pretty printing to show the recursive structure, but your
bedtime_story function actually returns those lines as a
list of strings without indentation:
['The mother of the parrot told a story about a cow...',
'The mother of the cow told a story about a flamingo...',
'The mother of the flamingo told a story about a heron...',
'and then the flamingo fell asleep.',
'and then the cow fell asleep.',
'and then the parrot fell asleep.']
Your implementation should be recursive and cannot use any
loops. What is the recursive structure? What sort of lists
produce the simplest story? (Hint: the simplest story is
[], which should be returned if fewer than 2 characters
are provided.) How do you construct the story in the recursive
case?
You should use the provided helper functions
first_sentence(object, subject) and
last_sentence(object) in your implementation. The following
examples illustrate their behavior:
first_sentence('parrot', 'cow') returns
'The mother of the parrot told a story about a cow...'.last_sentence('parrot') returns
'and then the parrot fell asleep.'.Be careful about the return types of the various functions:
first_sentence and last_sentence return
strings, while bedtime_story returns a
list of strings (sentences of the story). We have also
provided the helper function format_print in
runtests.py which prints out this list of “story strings”
in a nicely readable format.
You can test your implementation by typing the following into the Terminal:
python3 runtests.py q1 moose bear reindeerThis should produce the following story:
The mother of the moose told a story about a bear...
   The mother of the bear told a story about a reindeer...
   and then the bear fell asleep.
and then the moose fell asleep.
Note that the last character in the list (reindeer) in
the above example, is just the object of a story for the
bear, and not a subject of its own story.
You can also test out the bedtime_story function
directly in interactive Python; here is is one test you may want to
try:
>>> from recursive import bedtime_story
>>> bedtime_story(['parrot', 'cow', 'flamingo', 'heron'])
['The mother of the parrot told a story about a cow...',
'The mother of the cow told a story about a flamingo...',
'The mother of the flamingo told a story about a heron...',
'and then the flamingo fell asleep.',
'and then the cow fell asleep.',
'and then the parrot fell asleep.']
What types of inputs might lead your code to behave in unexpected
ways? The tests included in runtests.py do not test
all possible inputs, so you should think about so-called edge
cases that are not currently tested. For example, you should create
tests involving character lists with only 0 or 1 character name in them,
which returns an empty list, and verify that your implementation behaves
accordingly.
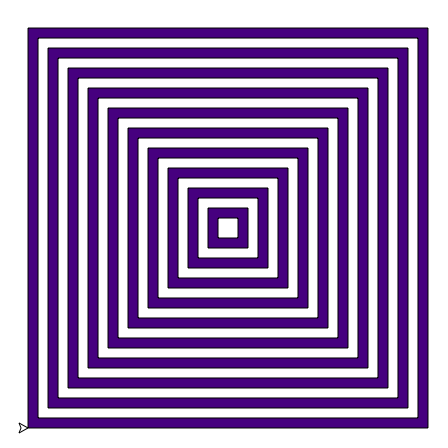
Implement a recursive function to draw concentric squares with our favorite turtle:
In particular, the function is
draw_nested_squares(size, gap, color, other_color) should
draw the concentric squares as well as return the total number
of squares drawn (as an int). The input parameters are:
size is the side length of the whole pattern (that
is, the largest square); the side length of each successive square is
decreased by twice the gap.
gap is the inset for the nested squares. That is, a
band of width gap is left showing after the nested squares
are drawn.
color is the color of the largest square you will
draw.
other_color is the color of the first square to draw
inside the outer one. (Note that color and
other_color alternate roles on the nested
squares.)
Observe some example test data below, which shows the function calls
with arguments. In the examples, the value after the function call
-> represents the function’s returned value:
draw_nested_squares(400, 40, PURPLE, WHITE) -> 5 
draw_nested_squares(400, 20, PURPLE, WHITE) -> 10
draw_nested_squares(400, 10, PURPLE, WHITE) -> 20
Assume the turtle is facing east and positioned at the lower left
corner of the outermost square when
draw_nested_squares(size, gap, color, other_color) is
called.
size < 2 * gap. Simply return 0 in this case.
Note: If you find that your answer is off by 1, check
that your comparison operator is < and not
<=!size and then
recursively draw nested squares.size - 2 * gap
and is centered inside the outermost square.To help you write your recursive function, we provide one helper
function draw_square(side_length, color) that draws a
square of side length side_length filled with color
color. The turtle should be in the lower left corner of the
square to draw and facing east when this is called. In addition to
draw_square, the only turtle commands you can use in your
function are forward, backward,
left, and right. You should not use
any loops.
You can test your implementation by typing the following into the Terminal:
python3 runtests.py q2 400 40This will draw nested squares with size 400 and gap 40. You can replace the numbers with different values to test your function with other inputs.
Want More Color Options? Check out this page for a list of turtle color names you can use in place of what we provide.
Once you are confident with your function implementation, you can run the following command to generate the image file that you will submit with your final assignment files:
python3 runtests.py finalThis should update the image nested_squares-400-40.png
to reflect the output from calling
draw_nested_squares(400, 40, PURPLE, WHITE).
Implement a recursive pattern to build a purple and gold quilt:
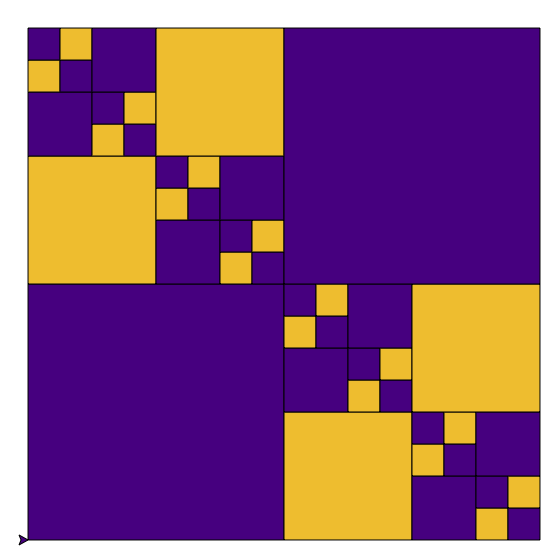
The function is
draw_quilt(quilt_size, min_size, quilt_color, other_color)
and it returns the total number of squares drawn (as an
int). The input parameters are:
quilt_size is the side length of the whole quilt
pattern.
min_size is the side length of the largest square
that can be drawn as a solid square, without further dividing it into
four smaller squares.
quilt_color is the color to use if you draw a solid
patch as part of the quilt pattern.
other_color is the patch color to use on any
recursive calls. (As in the nested squares, quilt_color and
other_color alternate roles on any nested calls to
draw_quilt…)
To get started on the design of your recursive function
draw_quilt(quilt_size, min_size, quilt_color, other_color),
let’s explore how quilt_size and min_size are
related. Note that the min_size will remain constant across
recursive calls. Most importantly, to draw a quilt where the
quilt_size <= min_size, we just draw a single square of
the quilt_color, and return 1, since all quilts will have
at least one square drawn. This is the base case of our quilt
design:
draw_quilt(512, 512, PURPLE, GOLD) -> 1 
draw_quilt(512, 512, GOLD, PURPLE) -> 1 
If quilt_size > min_size, then we must divide the
quilt into four smaller squares. The smaller squares appearing on the
top-right and bottom-left squares are solid squares of
quilt_color. The smaller squares appearing on the main
diagonal (top-left and bottom-right squares) are recursive quilts with
quilt_color and other_color swapped to make
the pattern more interesting.
Thus each recursive case should draw something in each of the
four quadrants, yielding two calls to draw_square and two
recursive calls to draw_quilt. In the following
two examples, the recursive calls are handled by the base case, leaving
four smaller solid squares as solid patches drawn with the appropriate
color:
draw_quilt(512, 256, PURPLE, GOLD) -> 4 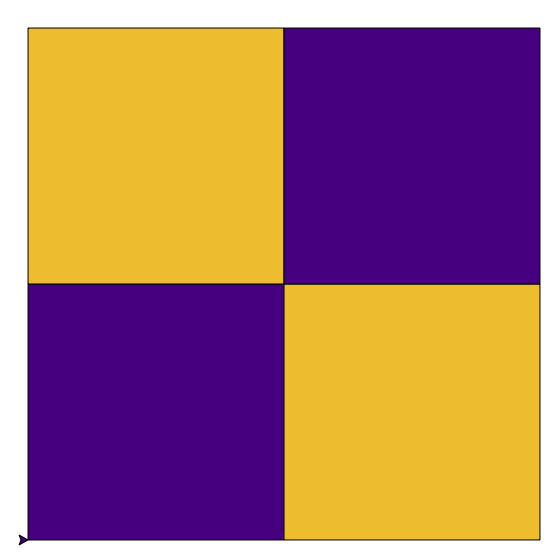
draw_quilt(512, 256, GOLD, PURPLE) -> 4 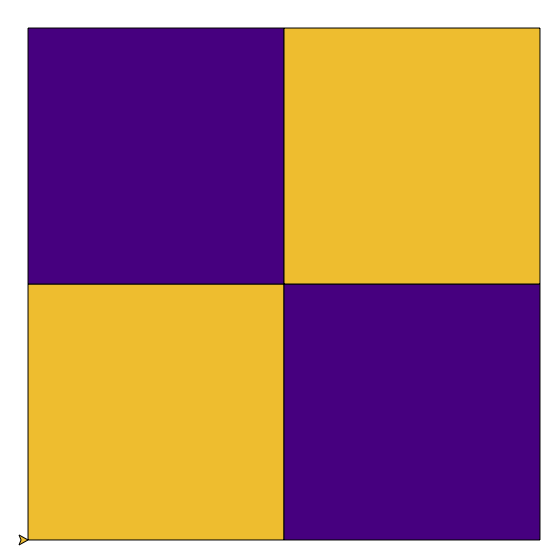
If the recursive quilt squares are still too big to be a single patch, then further recursive calls are made to break them up into four even smaller parts, yielding the following:
draw_quilt(512, 128, PURPLE, GOLD) -> 10 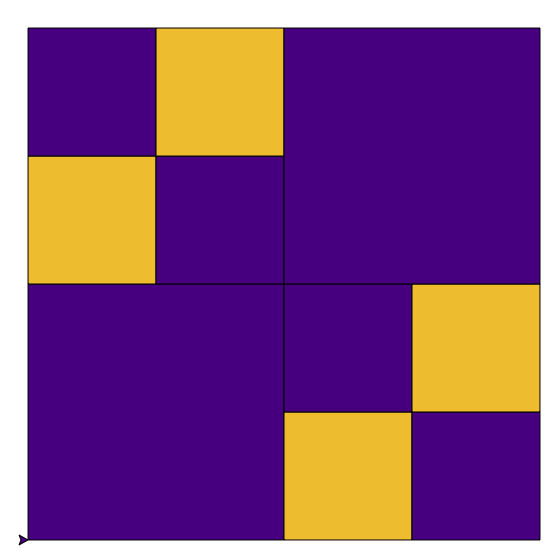
draw_quilt(512, 128, GOLD, PURPLE) -> 10 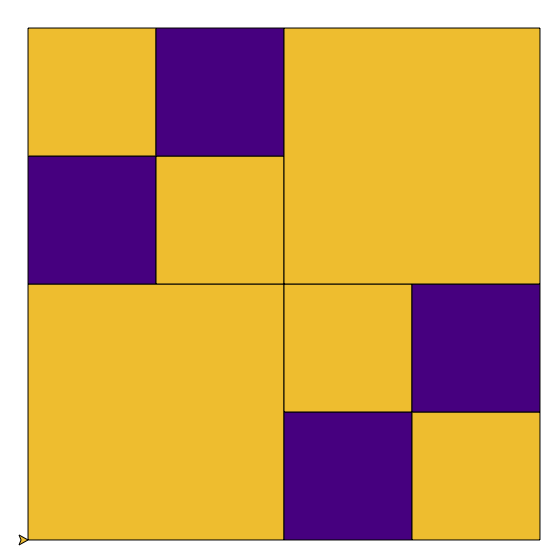
We can continue with smaller min_sizes to get even more
intricate patterns:
draw_quilt(512, 64, PURPLE, GOLD) -> 22 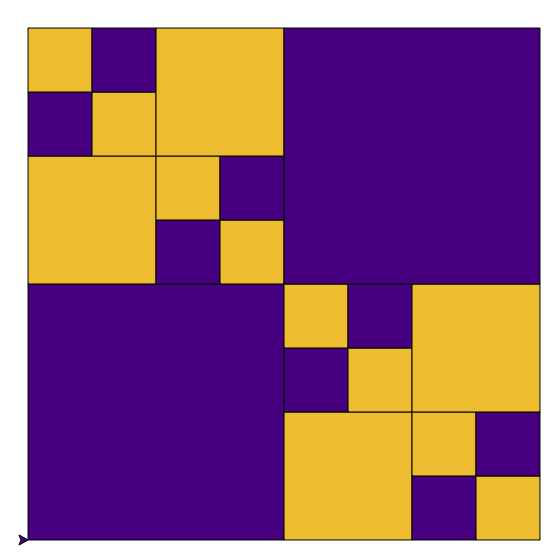
draw_quilt(512, 32, PURPLE, GOLD) -> 46
draw_quilt(512, 16, PURPLE, GOLD) -> 94 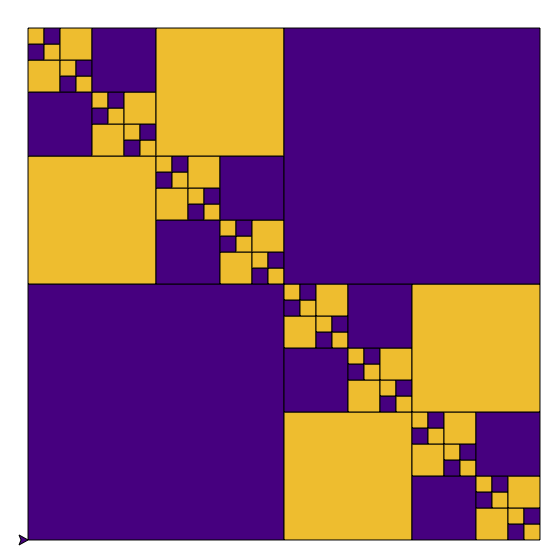
In the examples above, the value after the ->
indicates the value returned by that function call. You may assume the
turtle is facing east and positioned at
(-quilt_size/2, -quilt_size/2) when
draw_quilt(quilt_size, min_size, quilt_color, other_color)
is called. We provide the same draw_square helper function
and you should be able to write your draw_quilt function
using only that and the turtle functions forward,
backward, left, and right.
You can test your implementation by typing the following into the Terminal:
python3 runtests.py q3 512 128This will draw a quilt with quilt_size 512 and
min_size 128. Experiment with different values for those
arguments. Warning: It will take a very long time to draw
patterns where the min size is a lot smaller than the quilt size.
Once you are confident in your function’s implementation, you can run the following command to generate the image files that you will submit with your final assignment files:
python3 runtests.py finalThis should update the image quilt-518-128.png to
reflect the output from calling
draw_quilt(512, 128, PURPLE, GOLD).
Finally, write a recursive function named draw_shrub in
the file recursive.py that draws a tree pattern:
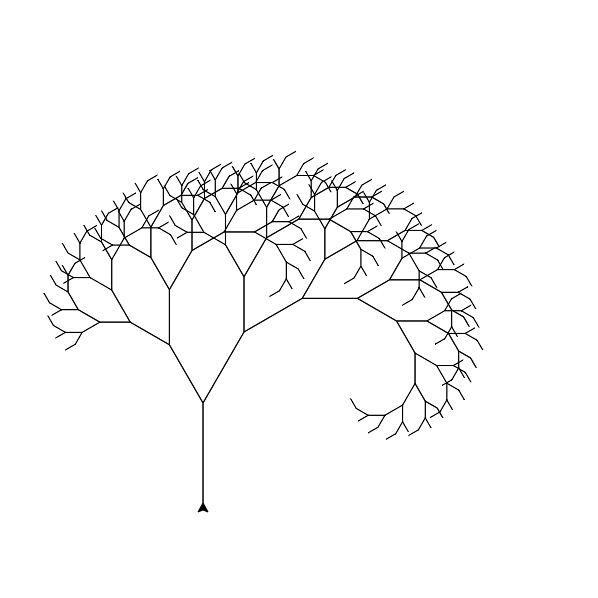
The function is
draw_shrub(trunk_length, angle, shrink_factor, min_length)
and it returns the total branch length (float) of the shrub, including
the trunk. The input arguments are:
trunk_length is the length of the vertical branch at
the base of the shrub.
angle is the angle between a trunk and its right
branch, and between the trunk and its left branch.
shrink_factor is the length of the right and left
branches relative to their trunk. Specifically, the length of the right
branch is shrink_factor * trunk_length, and the trunk of
the left branch is
shrink_factor * shrink_factor * trunk_length.
min_length is the minimum branch length in the
shrub. Branches less than min_length should not be
drawn.
Use only forward, backward,
left, and right turtle commands.
See the sample invocations of the draw_shrub function
below, with the value after the function call ->
indicating the value returned by that invocation. Due to the nature of
floats, your returned values should be very close to, but may not be
exactly those given below.
draw_shrub(100, 15, 0.8, 60) -> 308.0 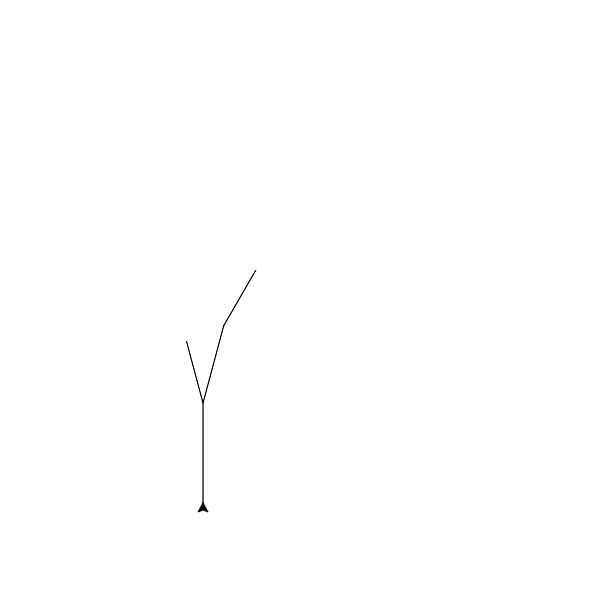
draw_shrub(100, 15, 0.8, 50) -> 461.6 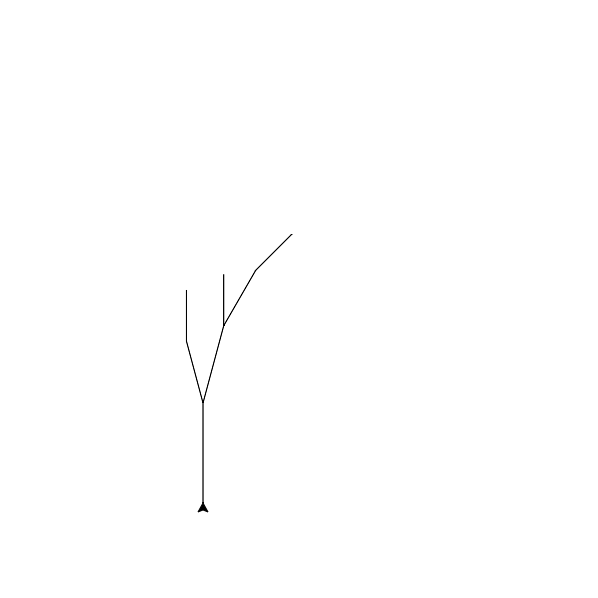
draw_shrub(100, 15, 0.8, 10) -> 3973.9861913600025
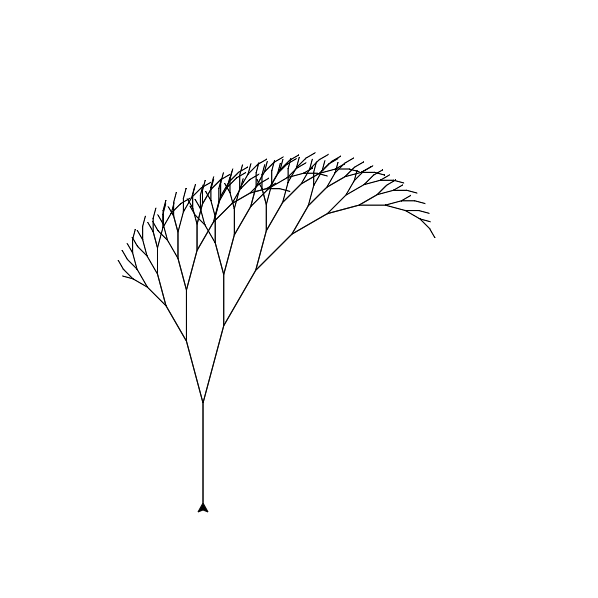
draw_shrub(100, 30, 0.82, 10) -> 6386.440567704483
You can test your implementation by typing the following into the Terminal:
python3 runtests.py q4 100 15 0.8 60This will draw a shrub with trunk_length 100,
angle 15, shrink_factor 0.8, and
min_length 60. You can change those values to draw
different shrubs. Here are some interesting test cases to try, and the
expected numeric results:
python3 runtests.py q4 100 15 0.8 60   # should print 308.0
python3 runtests.py q4 100 15 0.8 50   # should print 461.6
python3 runtests.py q4 100 15 0.8 40   # should print 666.4
python3 runtests.py q4 100 30 0.82 40  # should print 707.95
python3 runtests.py q4 200 90 0.75 40  # should print 1524.22
python3 runtests.py q4 100 15 0.8 10   # should print 3973.99
python3 runtests.py q4 100 30 0.82 10  # should print 6386.44
python3 runtests.py q4 200 90 0.75 10  # should print 5056.68
Once you are confident in your function’s implementation, you can run the following command to generate the image files that you will submit with your final assignment files:
python3 runtests.py finalThis should update the image shrub-100-15-8-10.png to
reflect the output from calling
draw_shrub(100, 15, 0.8, 10).
When you’re finished, commit and push your work to the evolene server
as in previous labs. Using the command
git commit -am "Your message here" will commit all files
that have changed, including the image files generated from running
python3 runtests.py final. Note that if you omit the
-a option when committing your files, you will need to
first manually add each image file that you would like to submit using
the git add command.
Do not modify function names or image file names
or interpret parameters differently from what is specified! Make sure
your functions follow the expected behavior in terms of type of input
and output: if they return lists, their default return
type must always be list. A
function’s documentation serves, in some way, as a contract
between you and your users. Deviating from this contract makes it hard
for potential users to adopt your implementation!
Functionality and programming style are important, just as both the content and the writing style are important when writing an essay. Make sure your variables are named well, and your use of comments, white space, and line breaks promote readability. We expect to see code that makes your logic as clear and easy to follow as possible.
Do not forget to add, commit, and push your work as it progresses! Test your code often to simplify debugging.
Please edit the README.md file and enter the names
of any appropriate students and resources on the
Collaboration line. Add, commit, and push this
change.
Near the bottom of the README.md, there is a
breakdown of the grading expectations that will form the basis of your
lab’s evaluation. Please keep these in mind as you work through your
lab!
Download a .zip archive of your work. Download
your assignment files for submission by going to your lab repository on
Gitlab, selecting the Download source code icon (a down
arrow), and select zip. Doing so should download all of
your lab files into a single zip archive as lab07-main.zip,
and place it inside your Downloads folder (or to whichever folder is set
as your browser’s default download location).
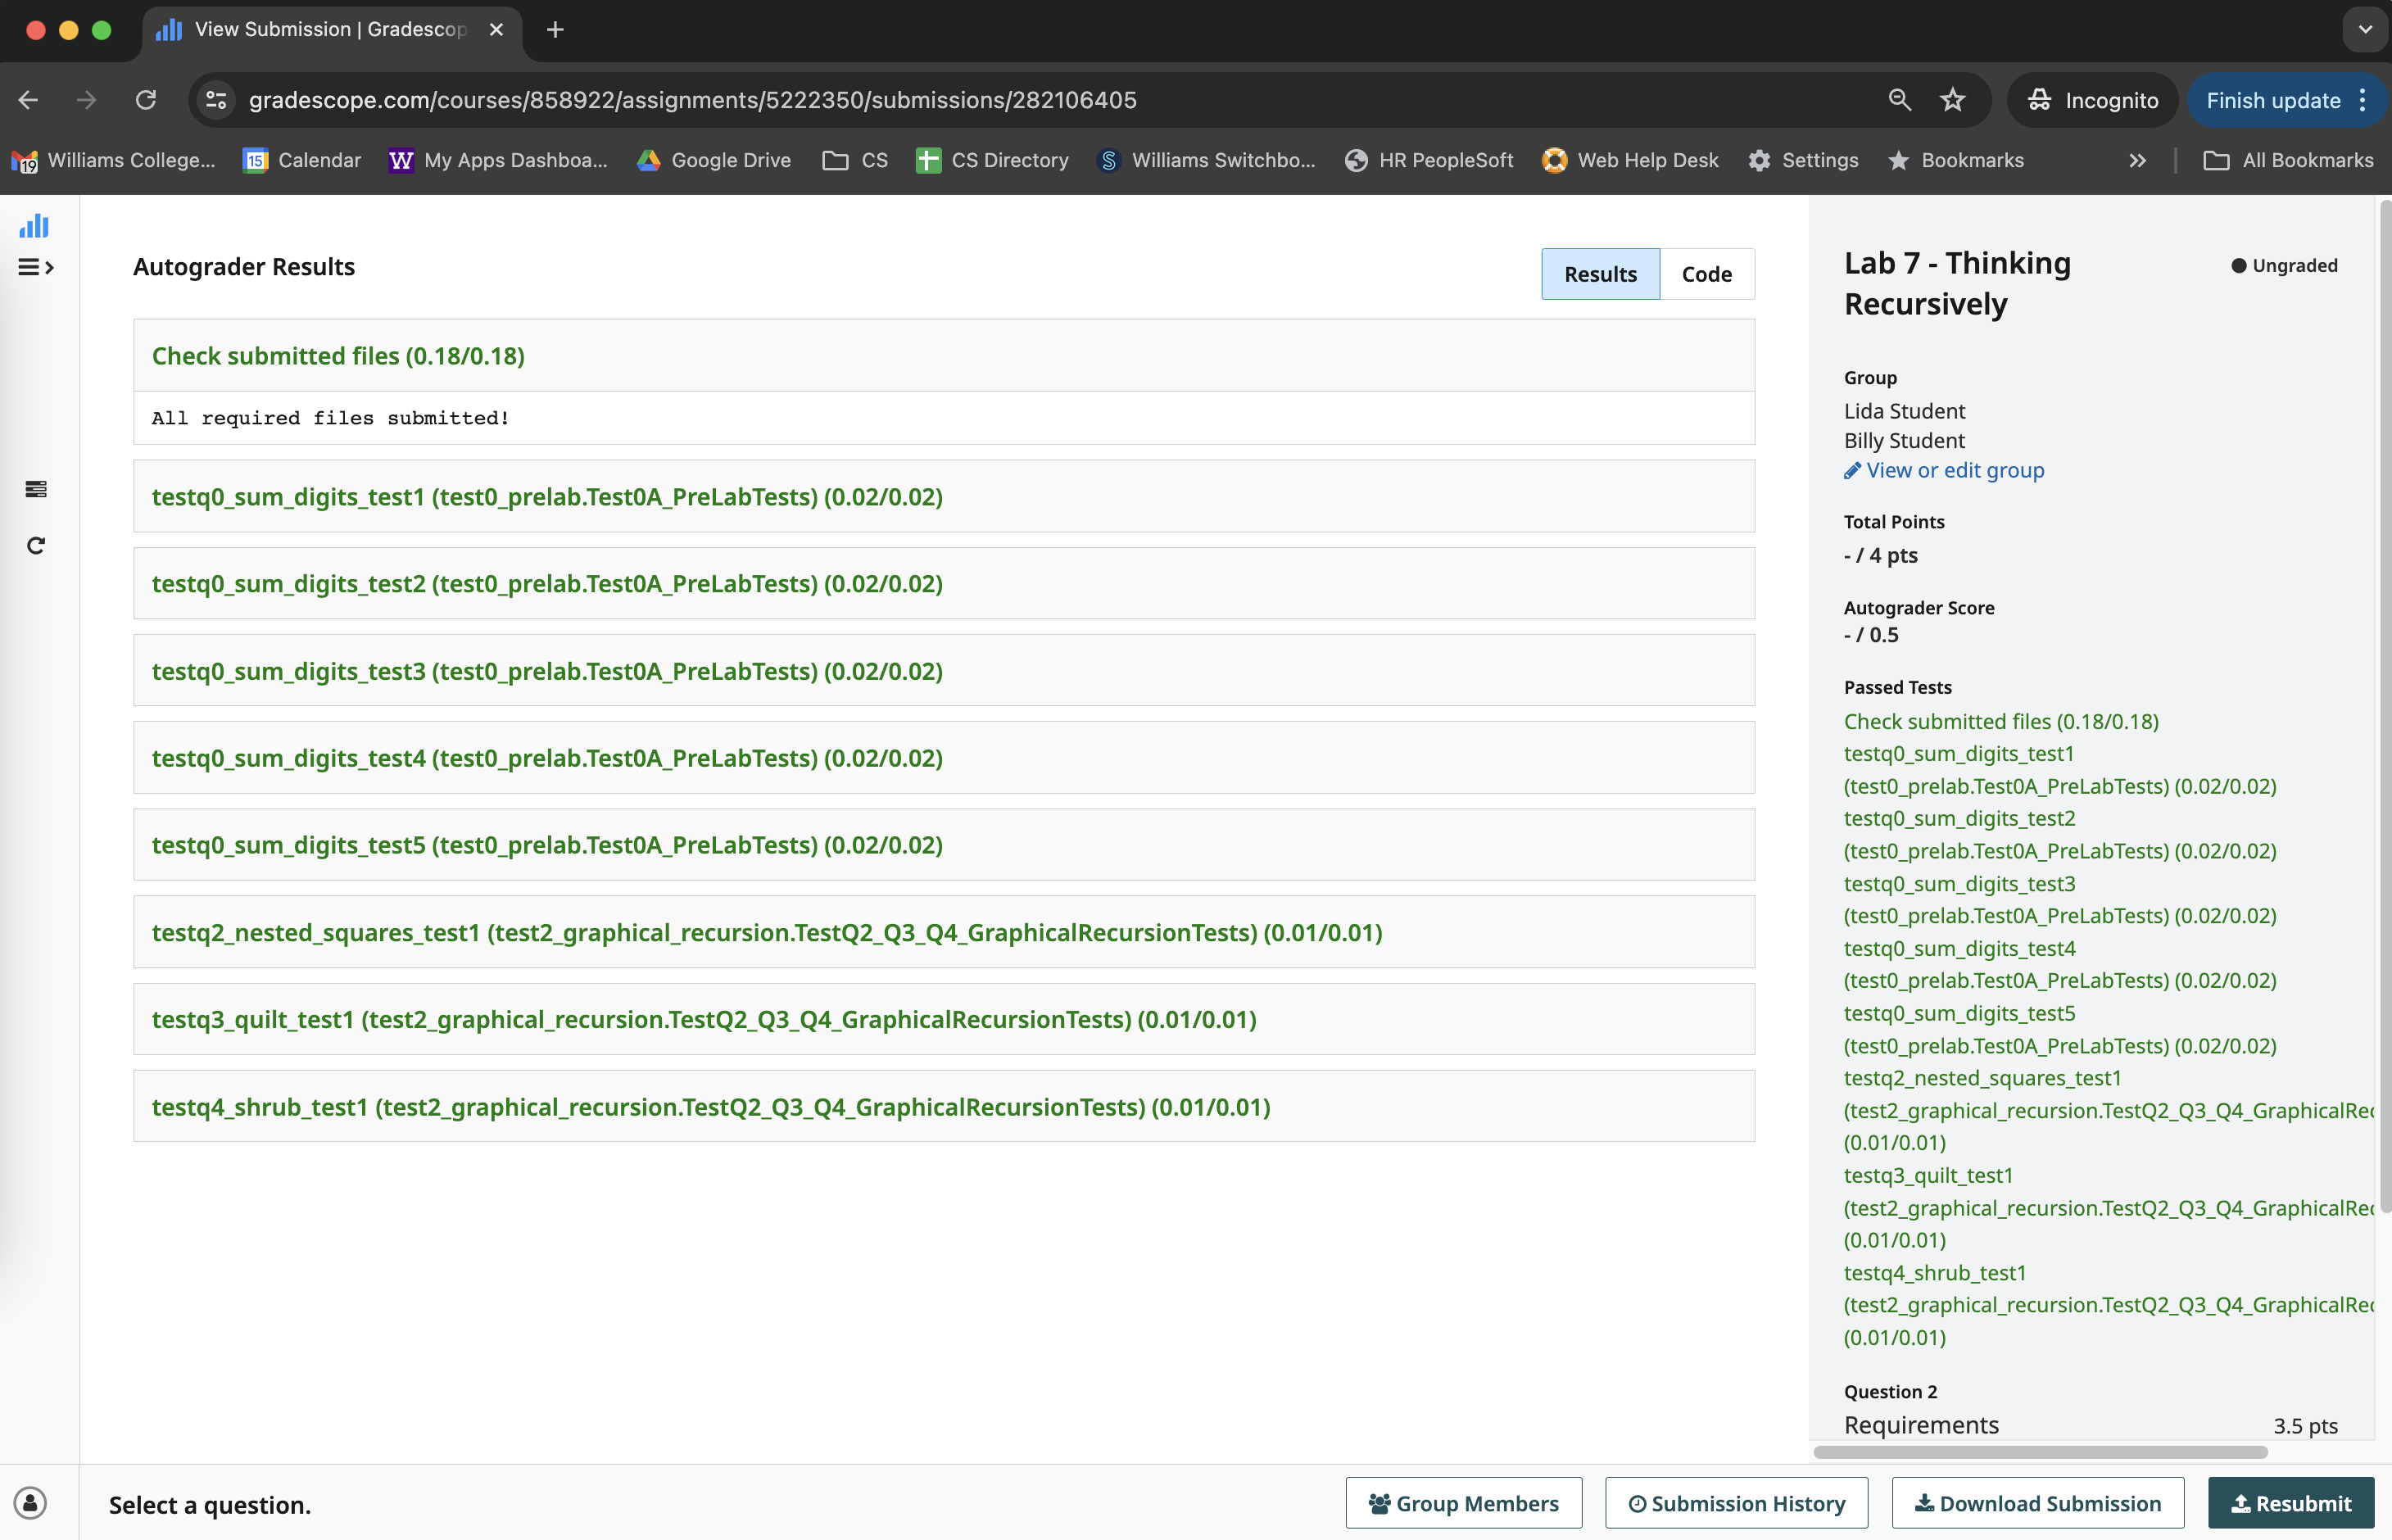
Submit your work. Navigate to the CS134 course on Gradescope. On your Dashboard, select the appropriate Lab Assignment. Drag and Drop your downloaded zip archive of the Lab Assignment from the previous step, and select ‘Upload’.

Acknowledgment. This lab assignment has been partially adapted from The Sampler Quilt by Julie Zelenski & Eric Roberts (1999 - 2001, Nifty Assignments) and Wellesley CS 111 Spring 2019 course materials.