This set of notes assumes that you have never used Unix before. It does assume, however, that you are comfortable using computers with a graphical user interface, such as the Macintosh operating system or Microsoft Windows. You should sit down at a Mac in the lab and go through this tutorial trying things out as they are explained. Upon completion, you should be able to understand the basics of entering commands, move around in the file system and view existing files, perform basic editing with the Emacs text editor, and know where to find help. To gain experience with these topics, try things out as you read.
Logging In
To start, you must log in to one of the Macintosh computers in our lab. Begin by entering the user name and password for your computer science account in the login window and click ``Log in''. Your user name for this account may be different than the one used for computer accounts provided by the Office of Information Technology (typically something like ewr1), and the initial password will also be different. You must obtain this password from your instructor. Once you log in, the screen should display a window containing icons for some of the files you can access on the machine.Changing Your Password
Before proceeding, you should change the password we assigned to your account to something that only you will know and that will be easier for you to remember. Don't, of course, make your new password too easy to guess. In particular, at least use something that is a mix of letters and numbers. If you forget your password, the system administrator can give you a new password. To change your password you should:- Point the mouse at the black Apple icon in the upper left corner of the screen. Depress and hold down the mouse button to open a menu.
- Select "System Preferences" from this menu.
- Click once on the "Accounts" icon in the window that appears.
- Change your password in this window.
- Close the window by clicking in the red circle in the top left corner.
Using the Mac Interface
Some of you may be new to Macintoshes, and this section highlights the most important elements of the interface. The files on the hard drive can be viewed by clicking on the "Mac HD" icon in the top right-hand corner of the screen. To go to your home directory, click on the house icon under "Places" in the Finder window.All Mac Windows roughly look like the following window:

Here are some basic window management operations:
- To change the size of the window, click the mouse in the lower, right corner and drag the mouse with the button held down.
- To close a window, click on the red circle in the title bar.
- To iconify a window (minimize), click on the yellow circle in the title bar. The window should appear as an icon at the bottom of the display in the tool bar. Clicking on the icon in the tool bar will restore the window.
- To maximize the size of a window, click on the green circle in the title bar. Clicking again will restore a window to its previous size.
You can start to get the feel for the environment by clicking on the Safari icon to start a web browser. (You are welcome to use Firefox if you are more comfortable with it.) The safari icon is in the tool bar and looks like the following:

Go to the class web page at http://www.cs.williams.edu/~jeannie/cs136 and find the electronic version of this page. Bookmark this page--you will be referring to it often during lab.
Using Unix Commands
In order to use the Unix interface on the Macintosh, you must first start the Terminal Program, which you can do by clicking on the following icon in the tool bar:
The Terminal Program will open a shell window in which will type Unix commands. For example, type the command "ls" in the shell window and press return. This command will list the files in your directory. A command consists of the name of a program, zero or more options preceded by '-', and zero or more arguments, which are themselves words. The command line is terminated with a carriage return.
If you make mistakes in typing on the command line, use the Delete or Backspace key to erase the previous character.
Here are other useful commands related to files:
| ls | List the files in the current directory |
| cp file1 file2 | Copy the file named file1 to a new file named file2 |
| mv file1 file2 | Rename the file named file1 to have the name file2. (mv is actually short for move, but it doesn't necessarily move anything!) |
| rm file1 | Remove the file named file1 |
| more file1 | Display the contents of a file |
| lpr file1 | Print the file named file1 |
One thing you will notice with Unix is that "no news is good news". Often if a Unix command is successful, it will produce no output! If it fails, you will receive an error message. Of the list of commands above, only ls and more produce output when they succeed.
The "more" command deserves some more explanation because it is an interactive
command. It displays your file one "screenful" at a time.
You can try out "more" by typing
more /opt/mac-cs-local/share/cs136/examples/alice.txt
After each screenful,
it displays a prompt either consisting of the name of the file being displayed
(for the first screenful), END (for
the last screenful), or : (for all other screenfuls). The prompt appears
at the bottom of the terminal screen. At this prompt, you have several options,
the most useful being:
| space | Display the next screenful |
| b | Display the previous screenful |
| q | Quit more, returning to a shell prompt. |
This will show you a file containing the first chapter of Alice in Wonderland. (One useful tidbit: hitting the tab key will autocomplete directory and file names. Try typing "/usr/mac" and then hitting the tab key. It should autocomplete /usr/mac-cs-local for you.)
When you use
ls to list your files, a directory will appear with
/ at the end of its name. At all times you have a current directory.
Your commands are interpreted with respect to your current directory by
default. So, for example, ls lists the files in your current directory
if you give it no arguments. Here are some useful commands to manipulate
directories:
| mkdir dir1 | Create a new directory named dir1. |
| rmdir dir1 | Remove the directory named dir1. You can only do this if the directory is empty. |
| cd dir1 | Make dir1 be the current directory |
| pwd | Display the name of the current working directory |
Filenames should consist only of letters, numbers, and some punctuation marks. A filename is typically divided into a descriptive name and an extension, separated by a period. Extensions are purely by convention but typically indicate the type of file. For example, "myfile.txt" would be a text file, while "myfile.java" would contain a Java program. Extensions are generally optional although some programs, such as the Java compiler, expect them to be there.
Filenames can be given as names that are relative to the current working directory or as absolute names from the special root directory. Thus far, we have assumed relative names that refer simply to files in the current directory. We can also use relative names to identify files in subdirectories. For example, "mydir/myfile" is the file named "myfile" in the directory named "mydir", where "mydir" is located in the current working directory.
Each user also has a home directory. This is the directory that is the current directory when you start a new shell window. (You have already found your home directory through the standard Mac interface). No matter what the absolute pathname is to your home directory, you can always refer to it with the special relative pathname '~'. For example, no matter what your current directory is, if you type "ls ~", you will see a listing of the files in your home directory.
An absolute pathname always begins with / while a relative pathname never does. To find out the pathname that corresponds to your current directory, type pwd. Use pwd to find the absolute path for your home directory.
One last useful feature of the command line: Pressing the up arrow
will give the last command you executed. Pressing return will run
that command again. Try this. You can access older commands in your
history by hitting the up arrow multiple times.
To practice these commands, copy the alice.txt file to your
home directory with the command
cp /usr/mac-cs-local/share/cs136/examples/alice.txt ~/alice.txt
Rename the file, move it into a newly created
subdirectory, and practice the other basic Unix commands as well.
Additional Shell Windows
You can create additional shell windows to work in more than one directory or on different tasks at the same time. When any terminal window has the focus (by clicking in it), the menus across the top of the screen should be "Terminal", "Shell", and so on. Select "New Window" or "New Tab" from the "Shell" menu. This will create a second terminal window or tab in your current window which you can use just as the one already open.To close a terminal window, click on the red circle in the title bar. To close only a single tab, click on the gray X in the right corner of the tab's title bar.
Basic Emacs
Emacs is a widely used text editor for Unix. To start Emacs, perform the following steps:
- Open a terminal window.
- Type "emacs &" in your shell window.
Emacs relies heavily upon control-characters as a means of entering editing commands. Many commands are also available via pulldown menus, but experienced users tend to use control commands almost exclusively. Over the semester, your repertoire of commands will grow and will move away from menus and toward keyboard commands. For now, let's create a new file. To do this, type Control-x followed by Control-f. (That is, hold down the control key and press x and then f.) At the bottom of the window, you will see "Find file: ~/" with a small black box following it. The box indicates where characters will go when you type. Type in the name of the file that you want to create and hit carriage return. (Alternatively, you can create a new file by selecting "Visit New File" from the "File" menu.
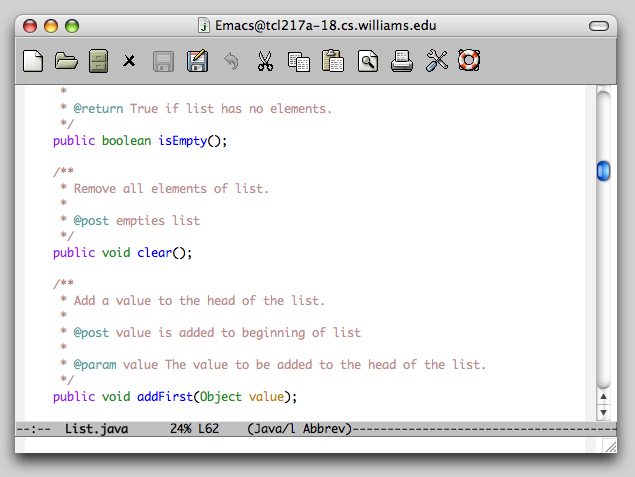
The last line of the Emacs window is where command prompts and messages appear. The embossed line immediately preceding it is a status line. It shows you the name of the file you are editing. Before that you should see -u:--. This means that the file is up-to-date. If it says, -u:**, it means the buffer has been changed since it was last saved. If it says -u:%%, it means that you cannot modify the file. After the filename is the current line number (L1 indicates the first line) and an indication of how far the current line is in the file in terms of percentage. "All" indicates that the entire file is showing. "Top" indicates that you are on the first screenful. "Bot" indicates that you are on the last (or bottom) screenful. The final entry is the "mode" that you are editing in. This should say "(Java/l Abbrev)" when editing a Java file.
The area between the menu titles and the status line is the buffer
that displays the contents of the file. Most of your typing goes
directly into this buffer. Type some text. Notice the status line
changes. You can move the cursor around using the arrow keys. Use the
scrollbar to move through the file. Use the "Save" command from
the File menu to save the buffer to a file. Use "Exit Emacs" from the
File menu to exit Emacs. Notice the characters that appear in
parentheses at the ends of command names in the menus. These tell you
the keyboard characters to type to execute the commands without using
the commands. For example, saving the buffer can be executed by typing
Control-x Control-s. In the menu control characters appear as C-. Type
these by holding the control key down at the same time as typing the
second character. Another common way to enter commands is using the
Escape key. This is abbreviated M-. In this case the escape key and
the following key are typed separately. For example M-x represents
typing the Escape key followed by the "x" key. You can also press the
"Apple" key and "x" at the same time to achieve the same effect. Here
are the keyboard sequences for the most common Emacs commands:
| C-v | Next screenful |
| M-v | Previous screenful |
| C-d | Delete next character |
| Backspace | Delete previous character |
| C-x C-s | Save buffer to a file |
| C-x C-f | Open a file |
| C-x C-c | Exit Emacs |
You can find more Emacs commands in the Emacs Hints Page.
Using keyboard commands is generally faster than moving one's hands back and forth between the mouse and keyboard as one must do to use the menus and scrollbar. While it takes extra effort to learn, the payoff is worth it in the long run in terms of speed of using the editor.
Using Java
To execute a Java program, you perform two steps. First, you compile the Java source file. For example, to compile the file "Hello.java", typejavac Hello.java
Assuming the program is free of compilation errors, a class file "Hello.class" will be created. This files contains the compiled representation of the program. To execute the program, you run the Java virtual machine with the command
java Hello
The command line argument to java is the name of the class whose main method you would like to run. Copy the file
/usr/mac-cs-local/share/cs136/examples/Hello.javato your home directory, compile it, and run it.