| Announcements | Introduction | FlashBuilder | Tips for Programming | Course Materials |
Announcements
- Now holding office hours in NSH 1505 Tuesdays 2-3pm (Same time, different place)
- This is not a programming course, but it does require some programming knowledge. Remember to start assignments early because programming takes time!
- Great resources include: your instructor (not last minute), fellow students (for general coding & debugging issues, no duplicating code), and the Internet (cite and comment all code you use).
- Here's a good collection of video tutorials from Adobe to get you started: http://www.adobe.com/devnet/flex/videotraining.html
Introduction
In this lab, you will learn fundamental concepts, skills and tools to rapidly prototype interactive applications. At the end of the course you will be able to:
- use programming tools to express your thoughts computationally (use programs as a medium for expression of design)
- be credible when you talk to people who do the production implementations.
- evaluate intuitively what's hard and what's easy to actually make.
- experience the interactive design process (implement prototypes, test them with users, and then modify them based on your findings).
FlashBuilder
The lab will largely consist of hands-on working through of the assignments. You are required to bring your laptop ready to the lab. Please download and install Flash Builder 4.6 (not 4.7) on your laptop before the lab time.
Download FlashBuilder 4.7 Trial (no 'Design' view)
Having trouble getting FlashBuilder to run your code? Change your default browser that FlashBuilder uses to run your files. See this website: http://flashadvanced.com/setting-up-default-browser-in-flex-builder/ (set to Safari or Firefox, not Chrome)
To open Flex Projects (.fxp) in FlashBuilder 4.6: File > Import FlashBuilder Project
To export your Flex Projects to a .fxp file in FlashBuilder 4.6: File > Export FlashBuilder Project
Tips for Programming
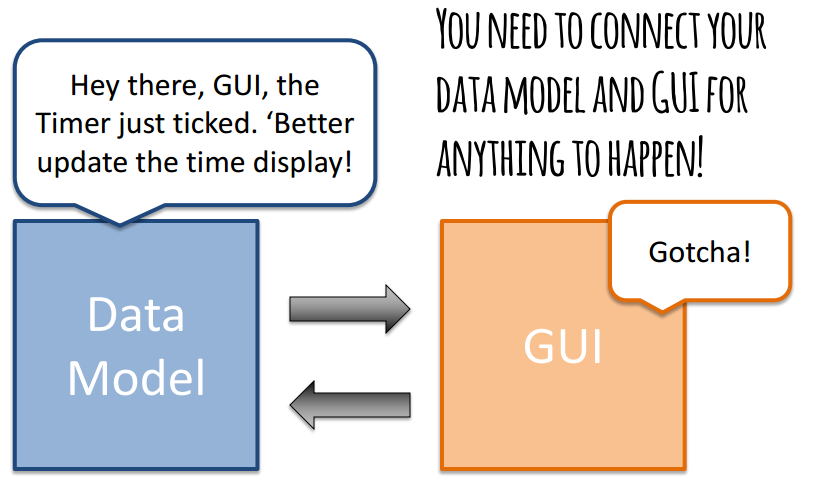
Remember that your Data Model needs to communicate with your GUI in order for anything to happen!
Try the following steps before you begin programming in Flex:
- Start by listing all the widgets you will need (buttons, labels, text areas, images, etc.).
- Implement only the widgets in FlashBuilder/XML.
- Then list all the functions youll need and what they should do (event handlers, converting functions, etc.).
- Type the function declarations (i.e. lines like protected function init():void), and include what they should do as comments in the functions.
- Choose one chunk to implement & test. Maybe start with only one bulletpoint that is 'required' in the homework.
- Implement your first chunk. Test it to make sure it works.
- Select, implement, and test another chunk. Make sure your previous chunks still work after youve added new code.
Materials
- Syllabus
- Please e-mail me your homeworks by midnight the night before class.
- HW5
- HW4
- HW3
- Homework 3 instructions (iterative prototyping & user testing) (doc)
- Homework 3 - UAR Report (doc)
- Homework 3 - UCRE Lecture on Heuristics (pdf)
- Lecture 5 - Different Kinds of Prototyping (pdf)
- Lecture 6 - Paper, PPT, & Flex Prototyping (pdf)
- Lecture 6 - A Working Alarm Clock Flex Prototype (txt)
- One possible way to use tabs:
<mx:TabNavigator x="100" y="50" width="500" height="350">
   <s:NavigatorContent width="100%" height="100%" label="Home">
      <s:Label x="10" y="10" width="100" height="20" text="Label Text Here "/>
   </s:NavigatorContent>
   <s:NavigatorContent width="100%" height="100%" label="AnotherTab">
      <s:Button x="10" y="40" width="100" height="20" label="Buttonlabel here"/>
   </s:NavigatorContent>
</mx:TabNavigator>
- One possible way to make a whole screen disappear/reappear:
<!-- loginScreen.visible = false; // ActionScript code for setting this group of objects invisible-->
	<s:Group id="loginScreen" visible="true">
		<s:Label id="lbl_loginprompt" x="25" y="25" width="500" height="43" fontSize="22" text="SkyMiles Login"/>
		<s:Label id="lbl_skymilesprompt" x="25" y="50" fontSize="10" text="SkyMiles Number" />
		<s:TextInput id="ti_skymiles" x="25" y="60" restrict="0-9" height="29" borderVisible="true" text="{SMN}"
		enabled="true"/>
		<s:Button id="btn_skymilessubmit" x="170" y="60" height="29" label="Log In" click="btnhandler_loginSubmit(event)"
		enabled="{chk_agreeterms.selected}"/>
		<s:CheckBox id="chk_agreeterms" x="25" y="100" label="Agree to Terms and Conditions" />
	</s:Group>
Lecture 7 (10/14/2013)
HW2
HW1
- Homework 1 instructions (summing integers, reverse alphabetical array sort, creative impression) (docx)
- Homework 1 - sum-start.fxp (txt)
- Homework 1 - sortbox-start.fxp (txt)
- First Steps in Flex - Hello, World video tutorial
- StackOverflow discussion of why output page might be blank
- In Flex Builder, select File > New> Flex Project
- If the New Flex Project dialog box asks you to select a Flex Server Technology, select Basic, and then click Next.
- Type HelloWorld as the Project Name, and then click Finish. Your new project will be created and should be showing in the Navigator panel. By default the project should already contain a file named HelloWorld.mxml, and that file should be open in the Editor panel.
- Replace the default .mxml code with the code below:
<?xml version="1.0" encoding="utf-8"?>
<s:Application xmlns:fx="http://ns.adobe.com/mxml/2009"
           xmlns:s="library://ns.adobe.com/flex/spark"
           xmlns:mx="library://ns.adobe.com/flex/mx" minWidth="955" minHeight="600">
<fx:Declarations>
    <!-- Place non-visual elements (e.g., services, value objects) here -->
</fx:Declarations>
<s:Label text="Hello World" x="100" y="100" />
</s:Application>
- Save the file (Ctrl+S).
- Run the file (Ctrl+F11)
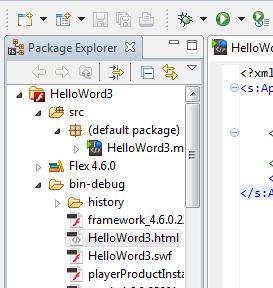
- Double-click the relevant .html file in your bin-debug directory. In this case, it's "HellowWorld3.html"
|
